NB the link for this recipe is now on Thermomummalailahrose’s blog at thermomumma.com see link above, no longer on the recipe community. Thanks to Lailah Rose for publishing on her blog. We were so disappointed to find it missing from the recipe community and thought we’d lost it forever. Definately pays to copy your favourite recipes.
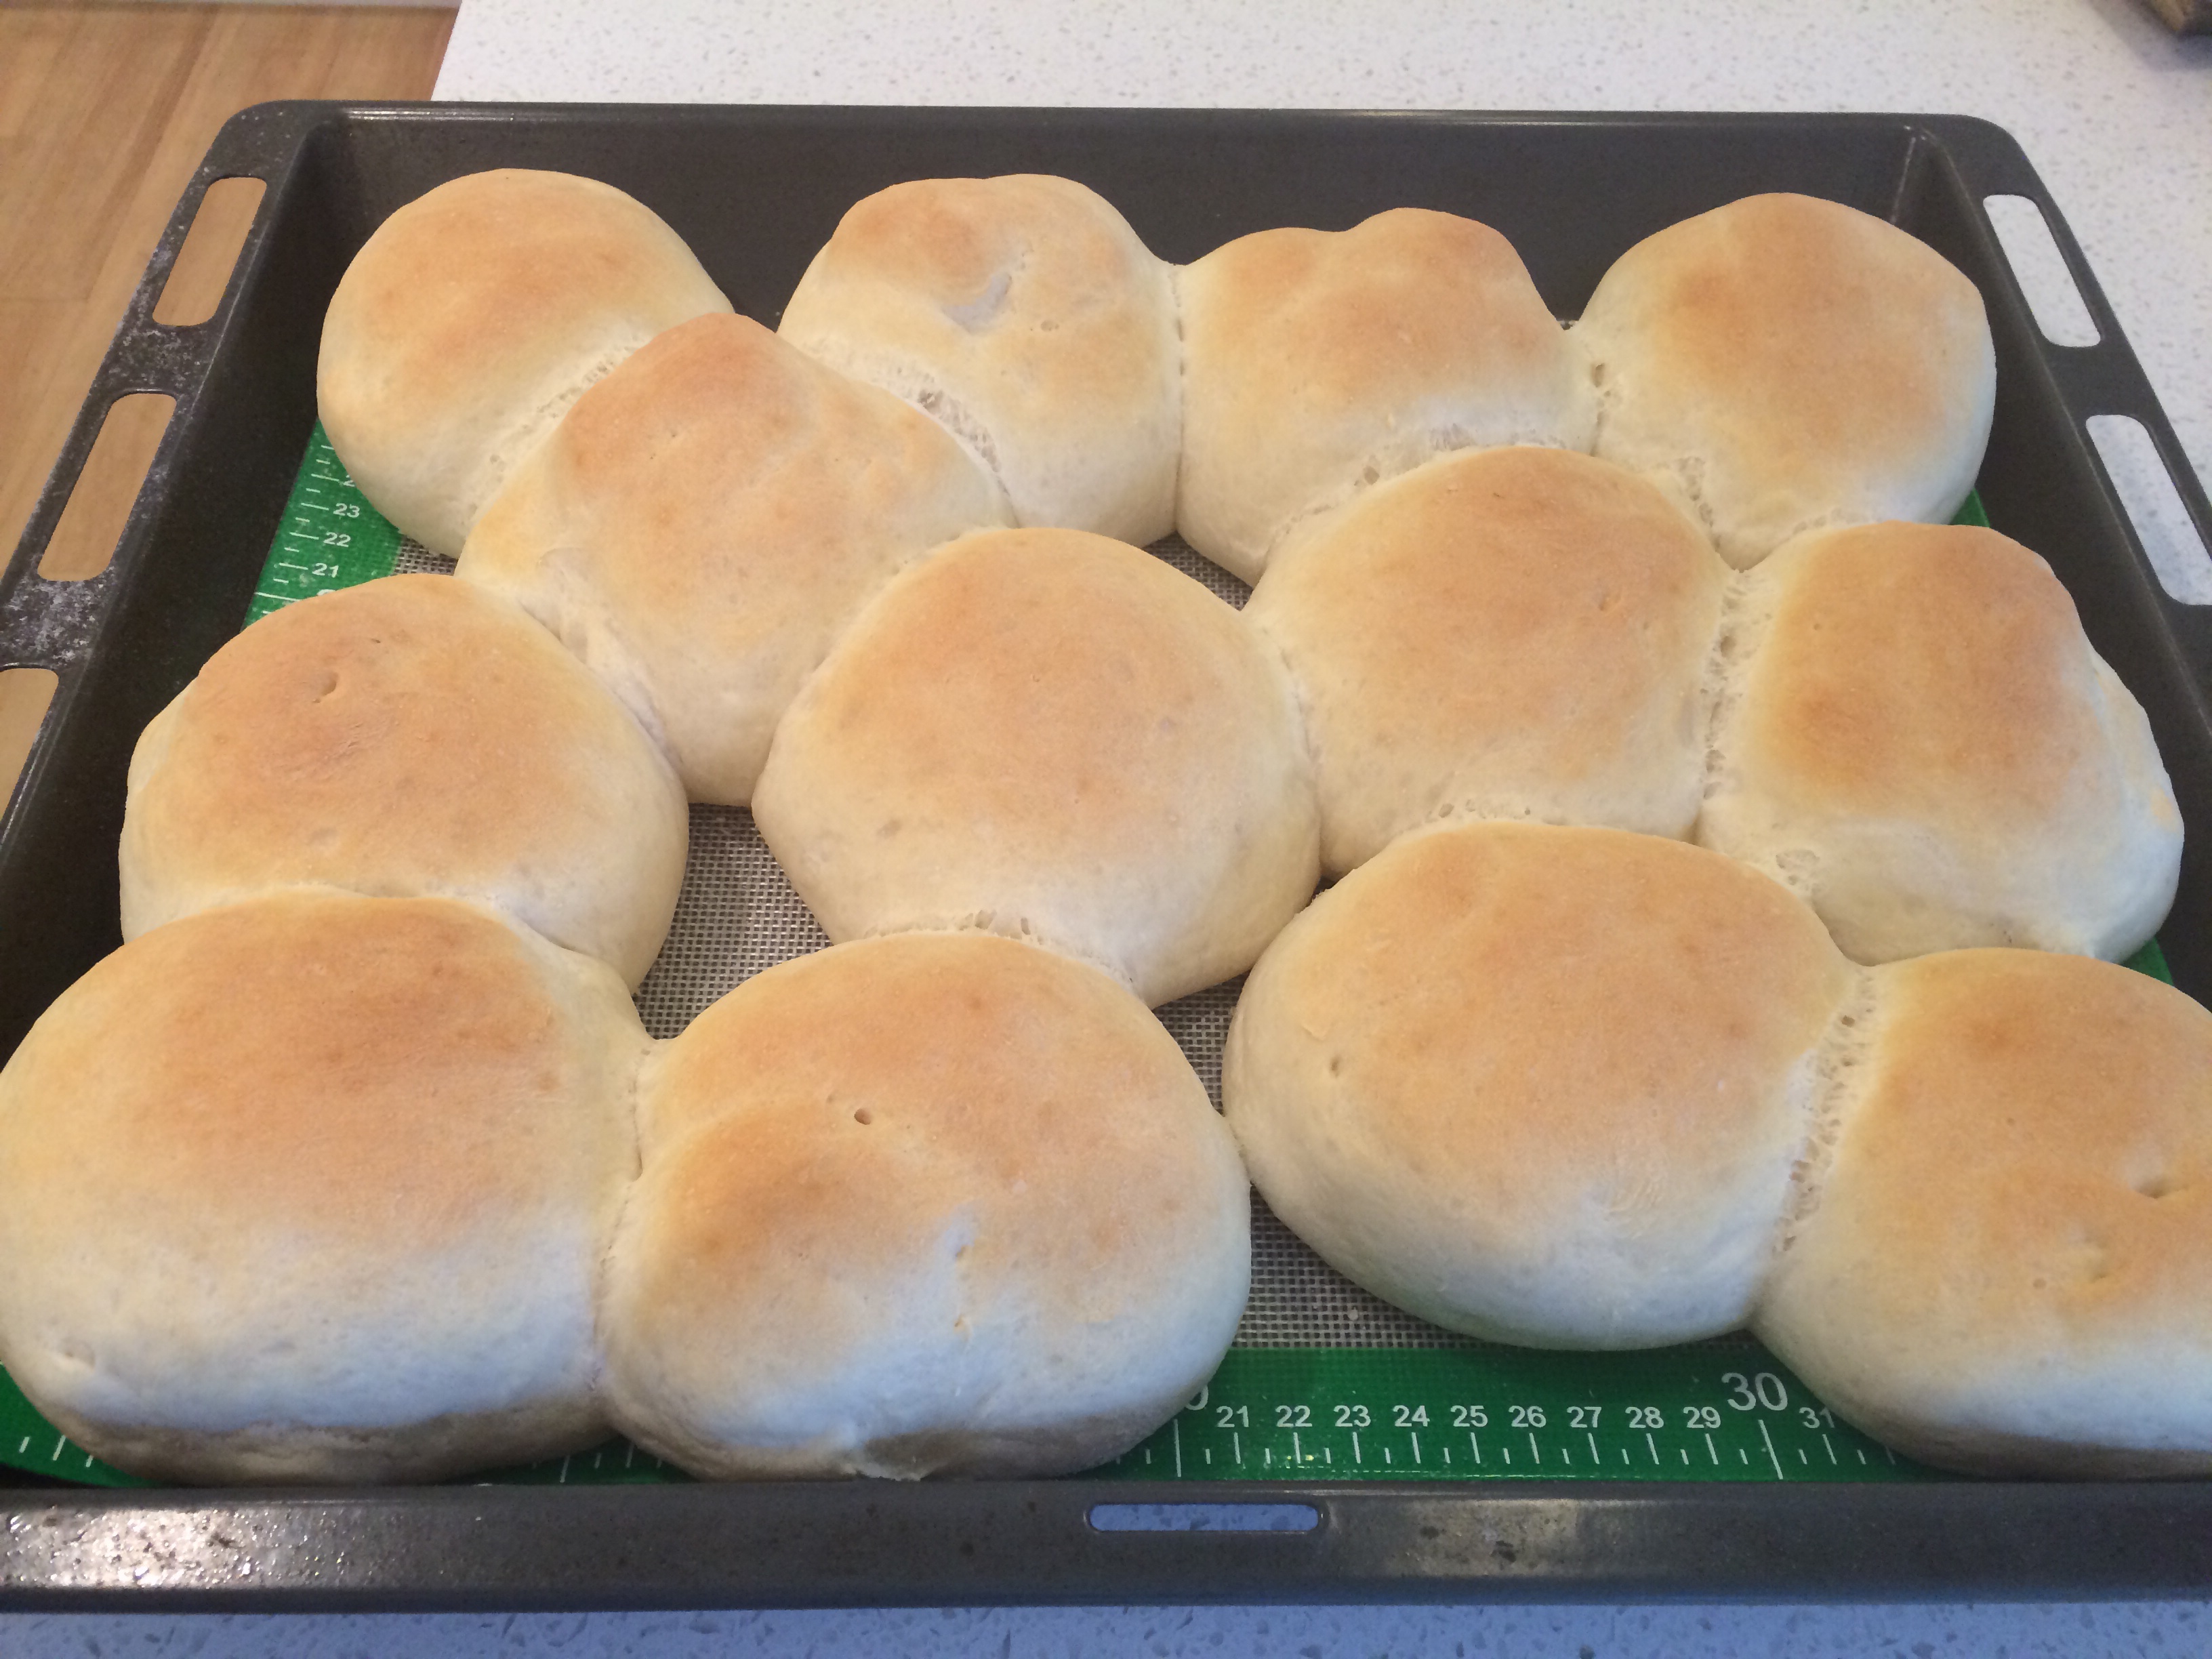
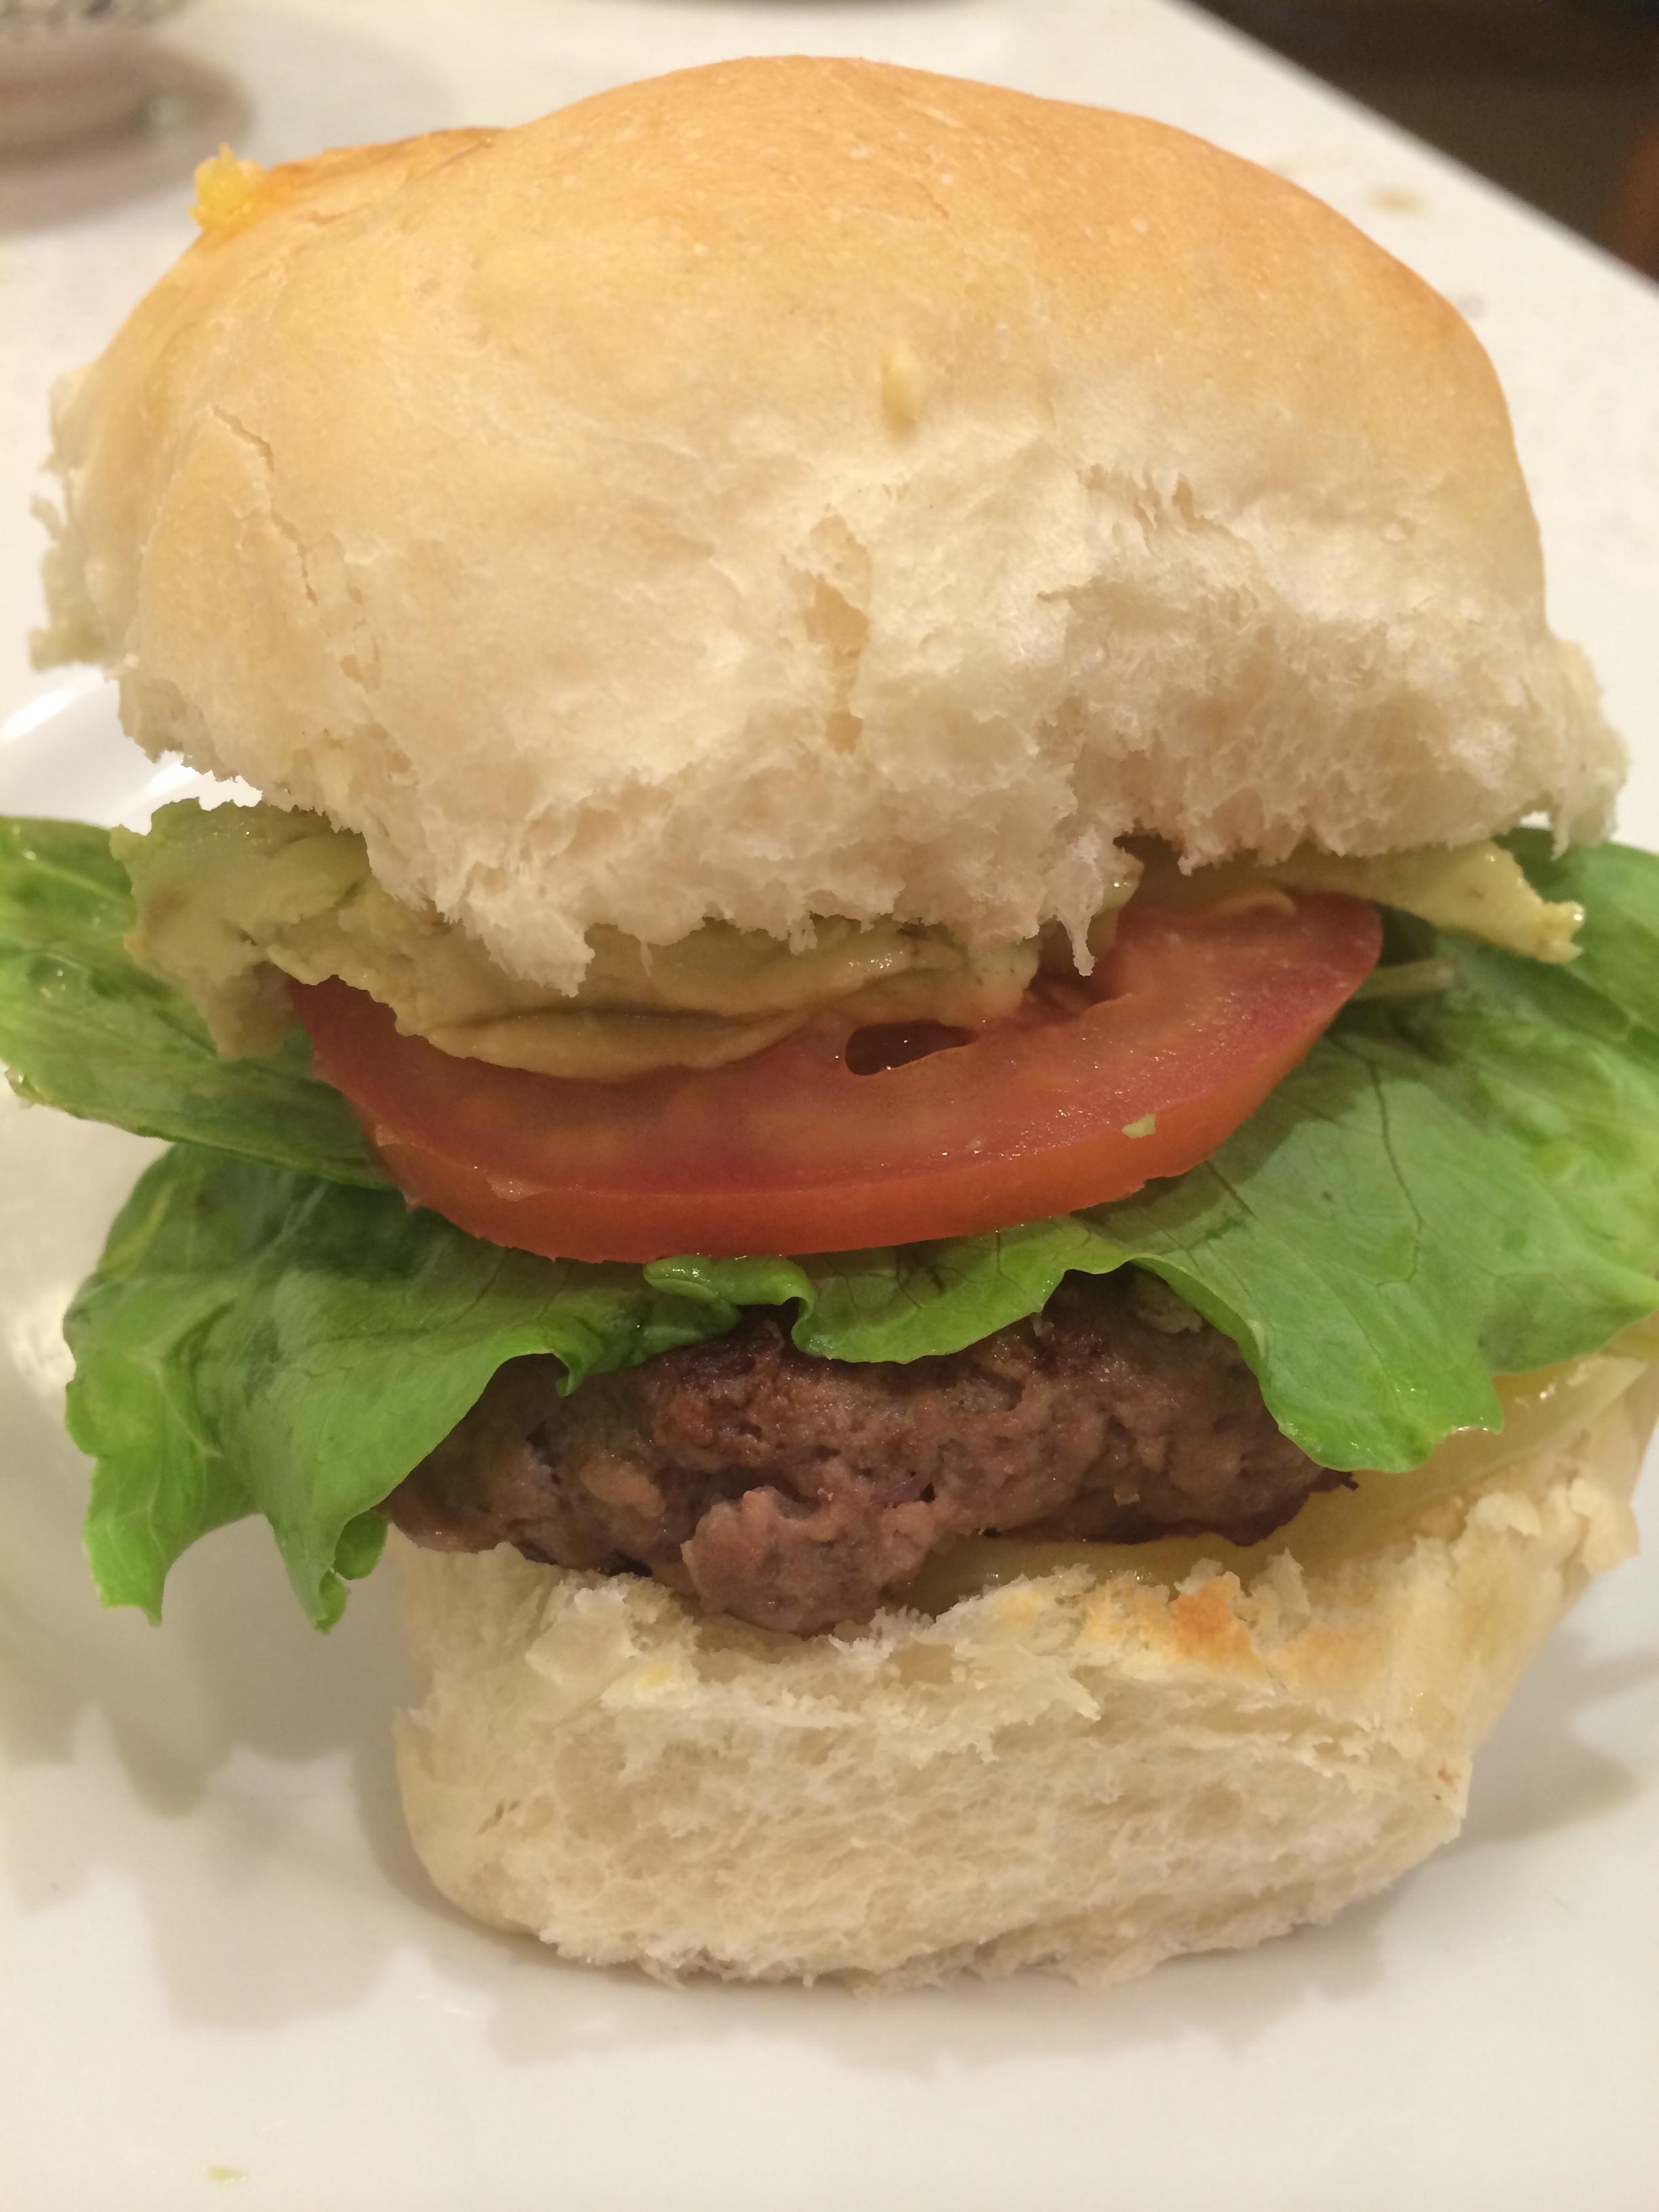
This recipe for Jumbo bread by Thermomumma (link above) makes AMAZING burger buns. This recipe was probably one of the top 10 most popular recipes from the community, always trending. They are crisp on the outside and fluffy on the inside, just like all the comments state, makes a bread/buns just like Bakers Delight. The bread rolls we made a couple of days ago (the bestest bread rolls ever) are a little denser than this recipe and make great filled rolls but not soft enough for burger buns.
The dough like all doughs is a breeze to make with the thermomix. Throw everything in TM bowl, mix 15 seconds and then knead on dough mode for 6 minutes. The first prove only 15 minutes, ( just left in the thermomix) then either put into a loaf tin or divide into rolls and prove for approx an hour. Putting buns in oven covered with a tea towel with a bowl of boiling water underneath seems to work well for second prove. Burgers for dinner tonight. Some comments have stated using gluten free flour also still works… Will be trying her recipes for fruit loaf and wholemeal bread next.
Homemade burgers
We are blown away by how great these burger buns are, you can’t tell they aren’t bought and the texture is just like a Wisconsin burger. Patties blended in thermomix. To my daughters who love burgers ; Blend a piece of bread (use an end), one onion and clove of garlic for a few seconds speed 7, add tray of 500g mince, an egg , salt and pepper, Worcester sauce, tomato paste and mix on dough mode for 45 seconds. Homemade burgers ….they’re better than any burger we’ve ever bought.
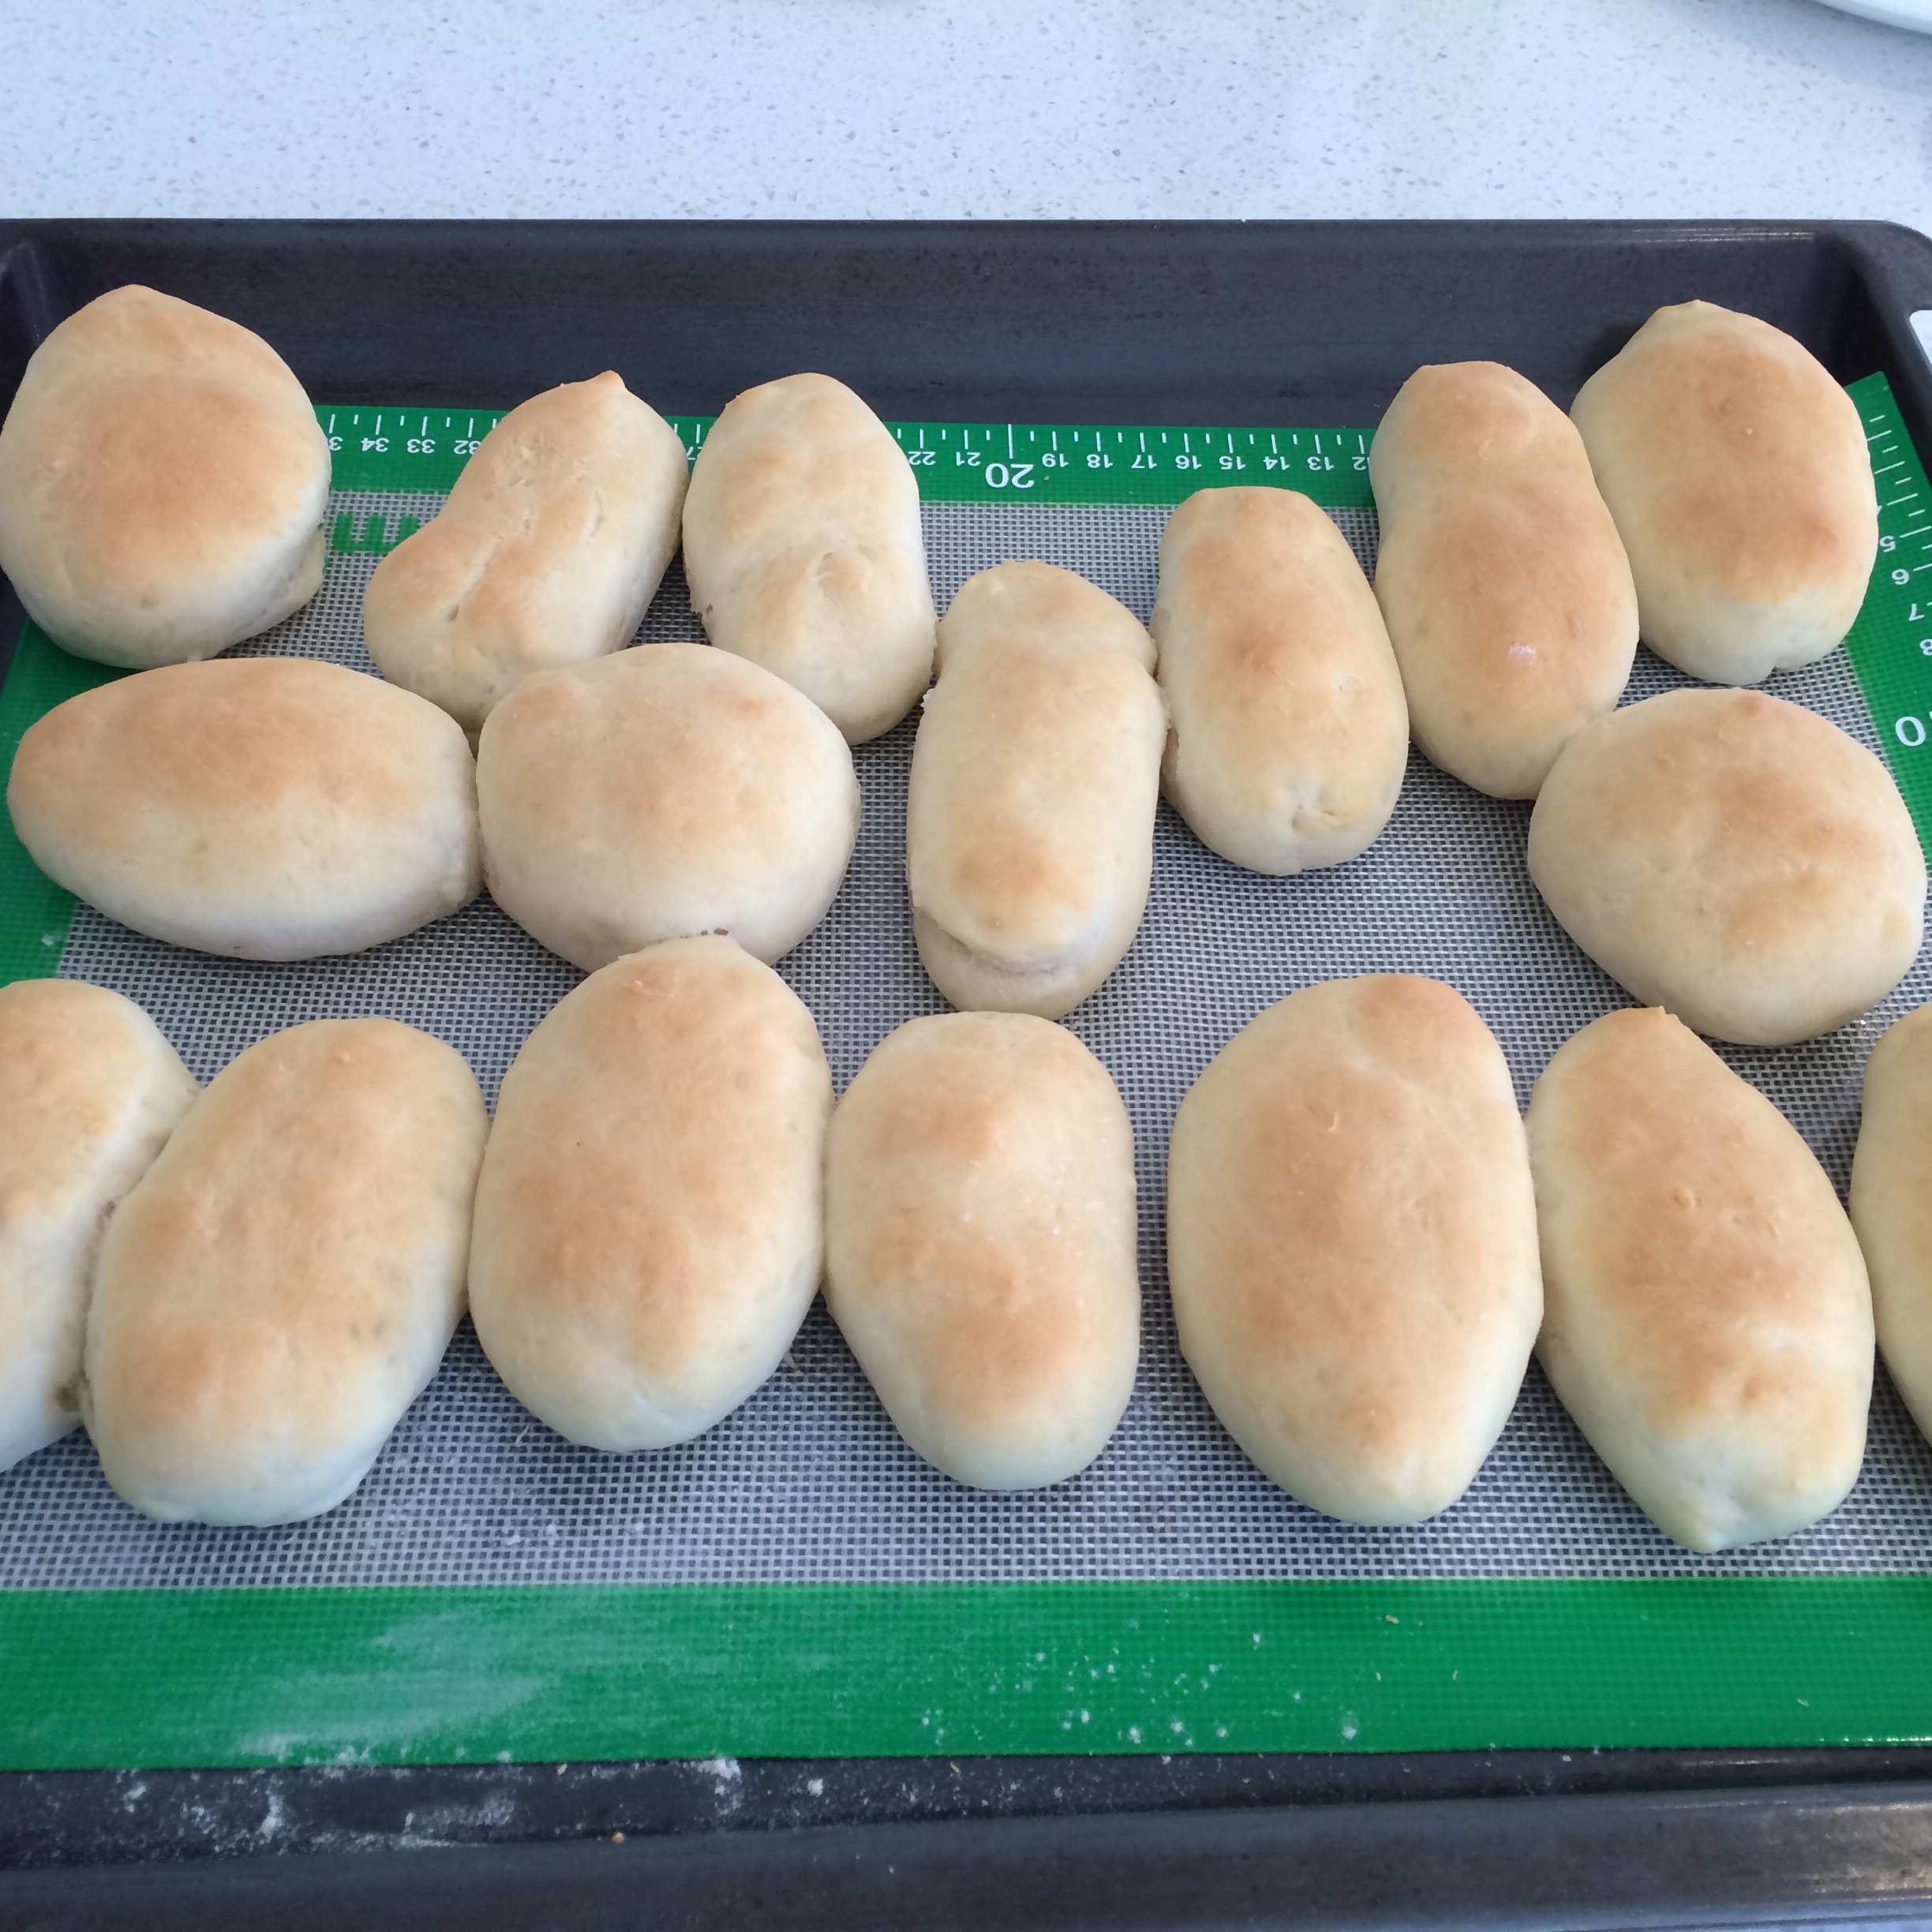
Heavans above! It IS the Bestest bread roll ever… With a title like that, it was a big promise from the recipe by Emilee Wong on the recipe community. The rolls took a bit longer at 180C about 25-30 minutes from cold ,the second prove happens at the same time as cooking. The first prove took about 45 minutes. They’re soft and fluffy and perfect for kids afternoon tea and lunchboxes. And the smell of freshly baked bread rolls is so comforting on a cold windy day. Bought the bread improver from the spice shop in Dominion Rd. Have tried some recipes without the bread improver and they haven’t been this good so I think it’s an important ingredient. Fantastic recipe and only took a couple minutes to make dough with the thermomix and makes a tray of rolls.
Used Annabel Langbein’s sticky bun recipe and substituted marmite and cheese for cinnamon and sugar. Snap frozen for lunch boxes. Love making bread doughs with the thermomix.
Sticky Buns Adapted for thermomix:- ( dough fills two large cake tins)
Add 125g butter and 490g milk to TM bowl. Heat 2.5 minutes, 50C, speed 2. Until butter melted.
Add one a sachet of dried yeast and 100g sugar. Heat 2 mins, 37C , speed 1.5. Leave 10 minutes, till yeast appears frothy.
Add 846g (6cups) flour, tsp salt. mix 6 sec on speed 5 first then, Knead 3.5 minutes dough mode.
Place dough in a large pot, I place pot in warm water for around 1 hour till dough has doubled in size. Halve dough, place one in fridge/freezer for use another day. Follow instructions in recipe link above for rolling out, filling and second prove.
Will be using this method every week to steam chicken and shred. (See link above)
It’s so simple .. just place chicken breasts in varoma dish for 25 mins, varoma temp, speed 2. ( with a litre of water in TM bowl). Pop back into TM bowl and shred 4 sec, reverse speed 4.
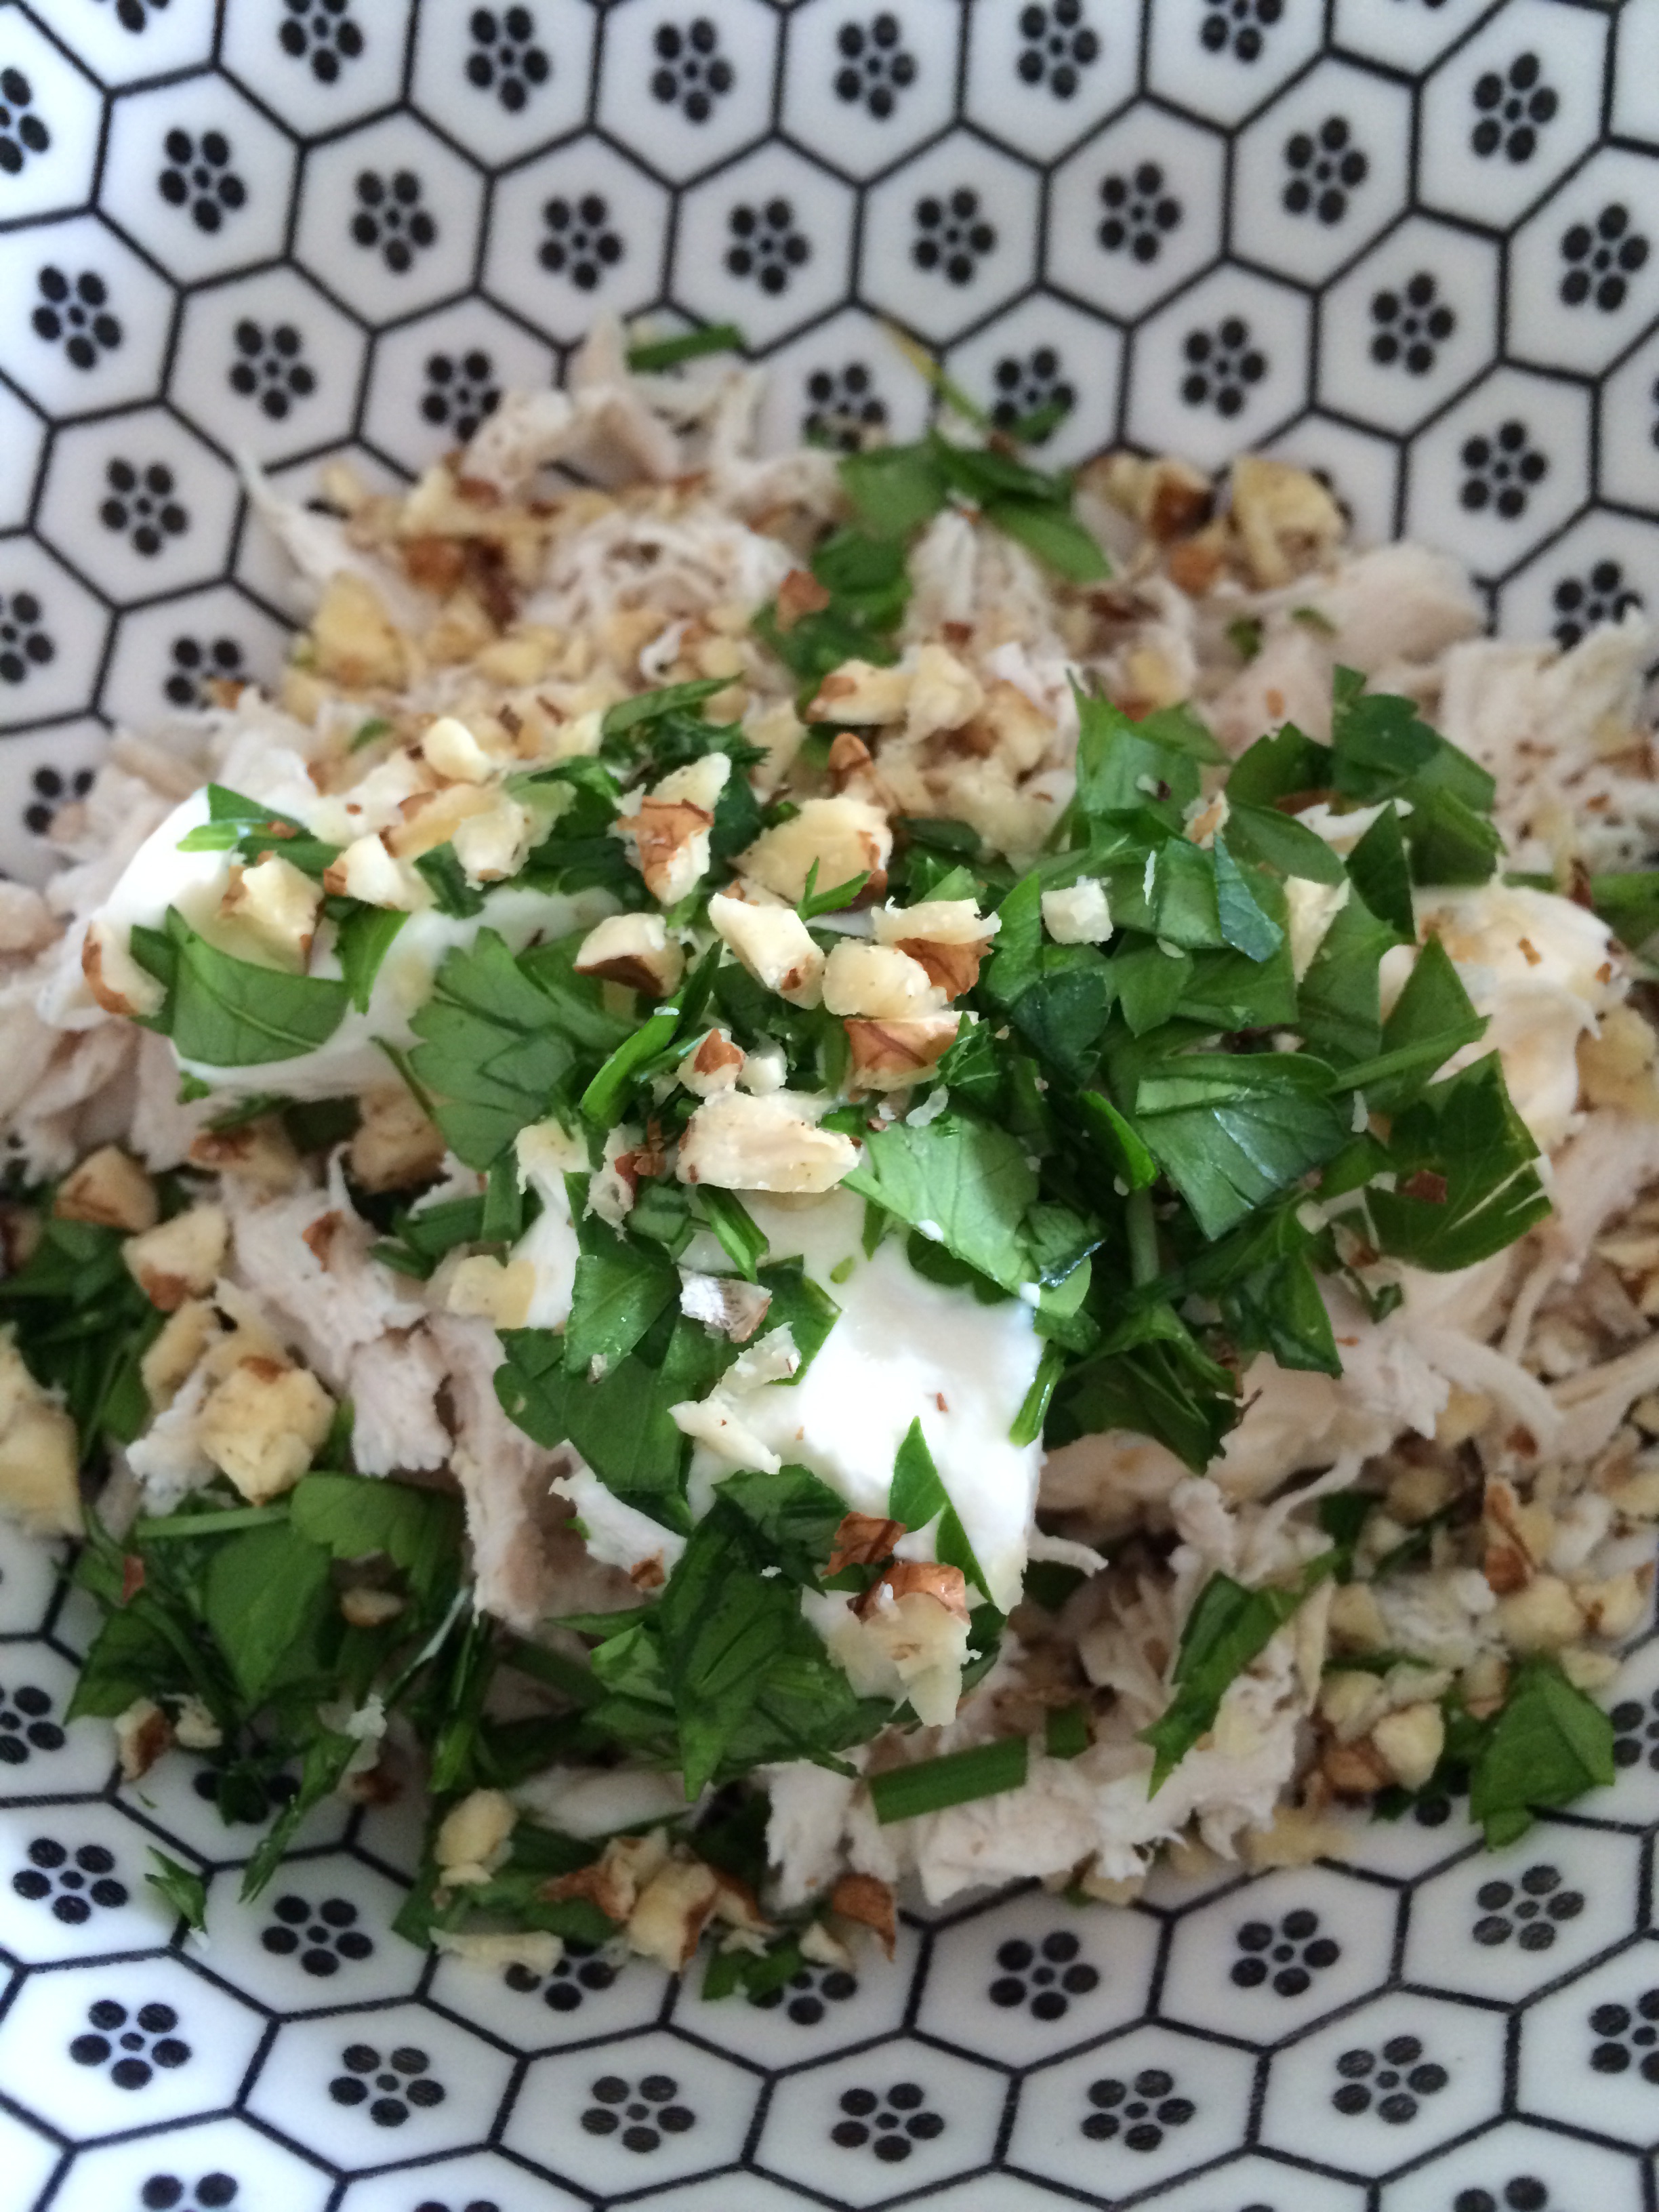
Enough shredded chicken for sandwiches and salads during the week and can freeze in smaller bags to take out when needed. The recipe shredded for 7 seconds, comments below the recipe suggested 4 seconds long enough which I will follow next time to have a chunkier spread. Now it’s so easy to mix the shredded chicken with a little mayo/sour cream and herbs for chicken sandwiches. Just had as a dip after school on crackers with some chopped nuts, cucumber, and celery all chopped in the thermomix. Perfect if you don’t want to get your hands dirty!
Love love love these bagels. They’re homemade and the texture and taste is amazing. Hot out of the oven with a homemade spread, omigoodness nothing quite compares. Have to save the recipe onto this blog for my girls. It’s from a recipe app called Robogourmet and these will be frozen tonight ready for breakfasts or lunches during the week. They do take an hour and half to prove but worth the effort if you’re home for a couple hours. The initial dough prep takes less than 5 minutes.
Bagels
290g warm water
480g flour (recipe stated bakers flour but I used any flour and it works)
2 tsp yeast (I use one sachet dried instant yeast)
25g sugar
1 tsp salt
Place all ingredients in the Thermomix. Mix for 15 secs/speed 6. Then knead on dough mode for 2 mins. Place dough in warmed Thermoserver and leave to rise for about one hour or leave in TM bowl.
Divide the dough into about 10 – 12 pieces ( approx 70g each ) and roll into balls. Use your thumbs to create a hole in the centre. Allow to rest on a lined baking tray for about 30 minutes. Cover with tea towel.
Heat oven to 240C. Boil a jug of water and tip water into a thermoserver or pot. Helps to have two containers of boiling water so you can do three bagels in each container at once. Drop three/ bagels into the boiling water for about 30 seconds per side. Use a slotted spoon to transfer to a rack to drain. Nb water must be close to boiling, if your water cools add more boiling water to increase temperature.
Return to the baking tray and bake in the oven for 15 minutes or until lightly golden.
Notes: Can brush with butter and coat with seeds before baking (eg Sesame/poppy/pumpkin) Bagels brown better if they’re not too soggy so just allow a few minutes to drain after the dipping process. Also can speed up the process by having two bowls of boiled water for dipping and Miss 14 to help drop the bagels into the water.
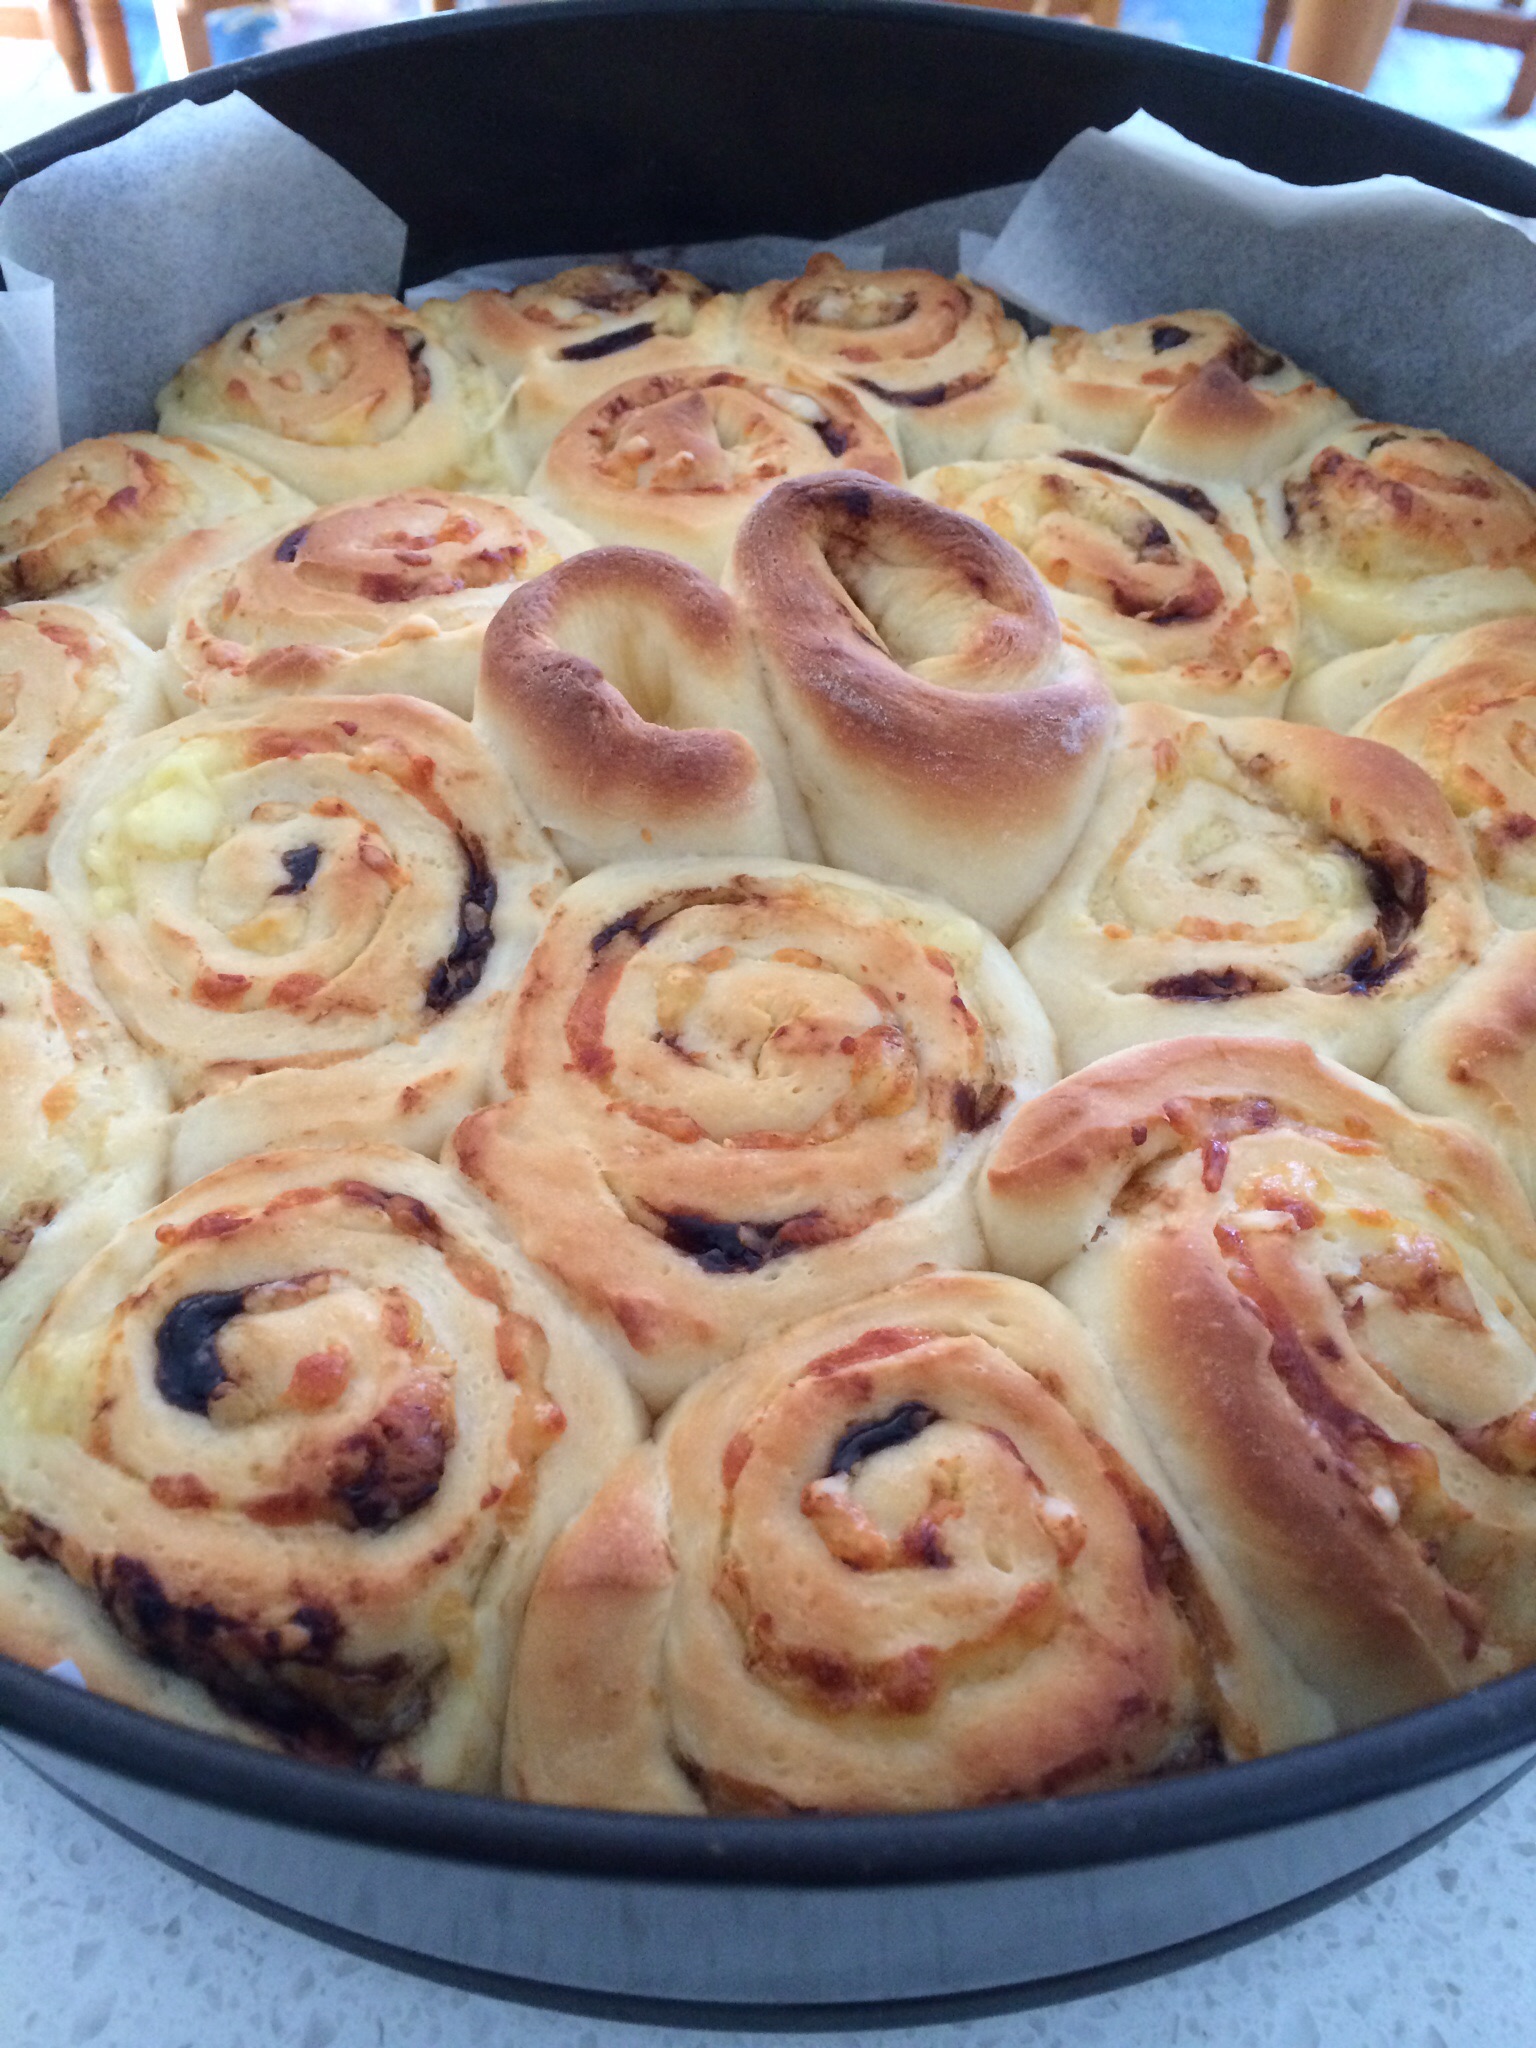
Coconut twists are are an old family recipe. My mum and aunty have made these for as long as I can remember and they evoke special childhood memories. Eaten straight from the oven , sticky crunchy coconut dotting the floor as the children sneak them off the tray when mum wasn’t looking. They were so good, when my mother and aunt opened a lunch bar in Queen Street in the 1970’s, they were a top seller. You can buy them in the Asian bakeries now but they’re the mass produced kind. None can rival that homemade taste and texture. Each roll slightly different from the next depending on how it was twisted and how much coconut sugar peaks out from each twist. And now the recipe has been published in Natalie Oldfield’s latest cookbook, “Love and Food at Grans Table”, a beautiful collection of grandparents recipes. Thanks to my dear cousin for sending in my aunt’s treasured recipes.
Converted the recipe for the Thermomix and oh my goodness, they’ve turned out fabulous. For some reason there’s alot of coconut sugar left over after rolling and making the twists so they weren’t sweet enough, next time I’ll melt the butter into the coconut sugar instead of buttering the rolled dough and sprinkling over the top. 6 1/2 cups of flour makes three trays of buns.
The kids came home from school to these wonderful twists on the table and gave them the thumbs up. I am literally jumping up and down with joy, a recipe is preserved for the next generation.
Coconut Twists
125 g butter
1 c milk
3/4 – 1 c water
1/4 c sugar
3-4 tsp dried yeast
2 eggs
6 1/2 c flour (810g)
1 tsp salt
Coconut Filling
2 c coconut
1/2 c sugar
90g butter
2 tsp vanilla essense
Method
Combine and melt butter, milk and water in tmx – mix 2 mins, 50c , speed 2.
Add yeast, sugar- mix 2 mins, 37c , speed 1. Leave 10 minutes. ( yeast will activate and froth)
Add other ingredients. Knead on dough mode 4 minutes.
Leave dough in warm place till doubled in size.
Punch down dough, roll out to into a large square. Mix filling ingredients and put the coconut filling on half the square and fold dough over. Cut into strips 4 cm wide twist twice and set onto lined or greased baking trays. Cover with tea towel and leave to rise until they have doubled in size.
Preheat oven to 200c. Bake for 12-14 minutes. Leave to cool on trays. Makes 30.
Pizza bread flavoured with garlic and thyme, and porridge for breakfast and school lunches
First week back from school holidays, getting back into semblance of a routine has meant less time to blog. This week is marked by food highs, one thermomix food fail( didn’t follow the recipe ) and some reliable basic recipe standards. The reliable standards were smoothies, milkshakes, pizza bread, porridge, shortbread ( a new recipe I tried from the community, had 81 top ratings and was great ) link below http://www.recipecommunity.com.au/baking-sweet-recipes/grandmas-shortbread/45249, Masterchef chocolate brownie (recipe community), wholemeal bread rolls using soft butter rolls as a base,KFC chicken recipe(road to loving my Thermomix recipe) minestrone soup,
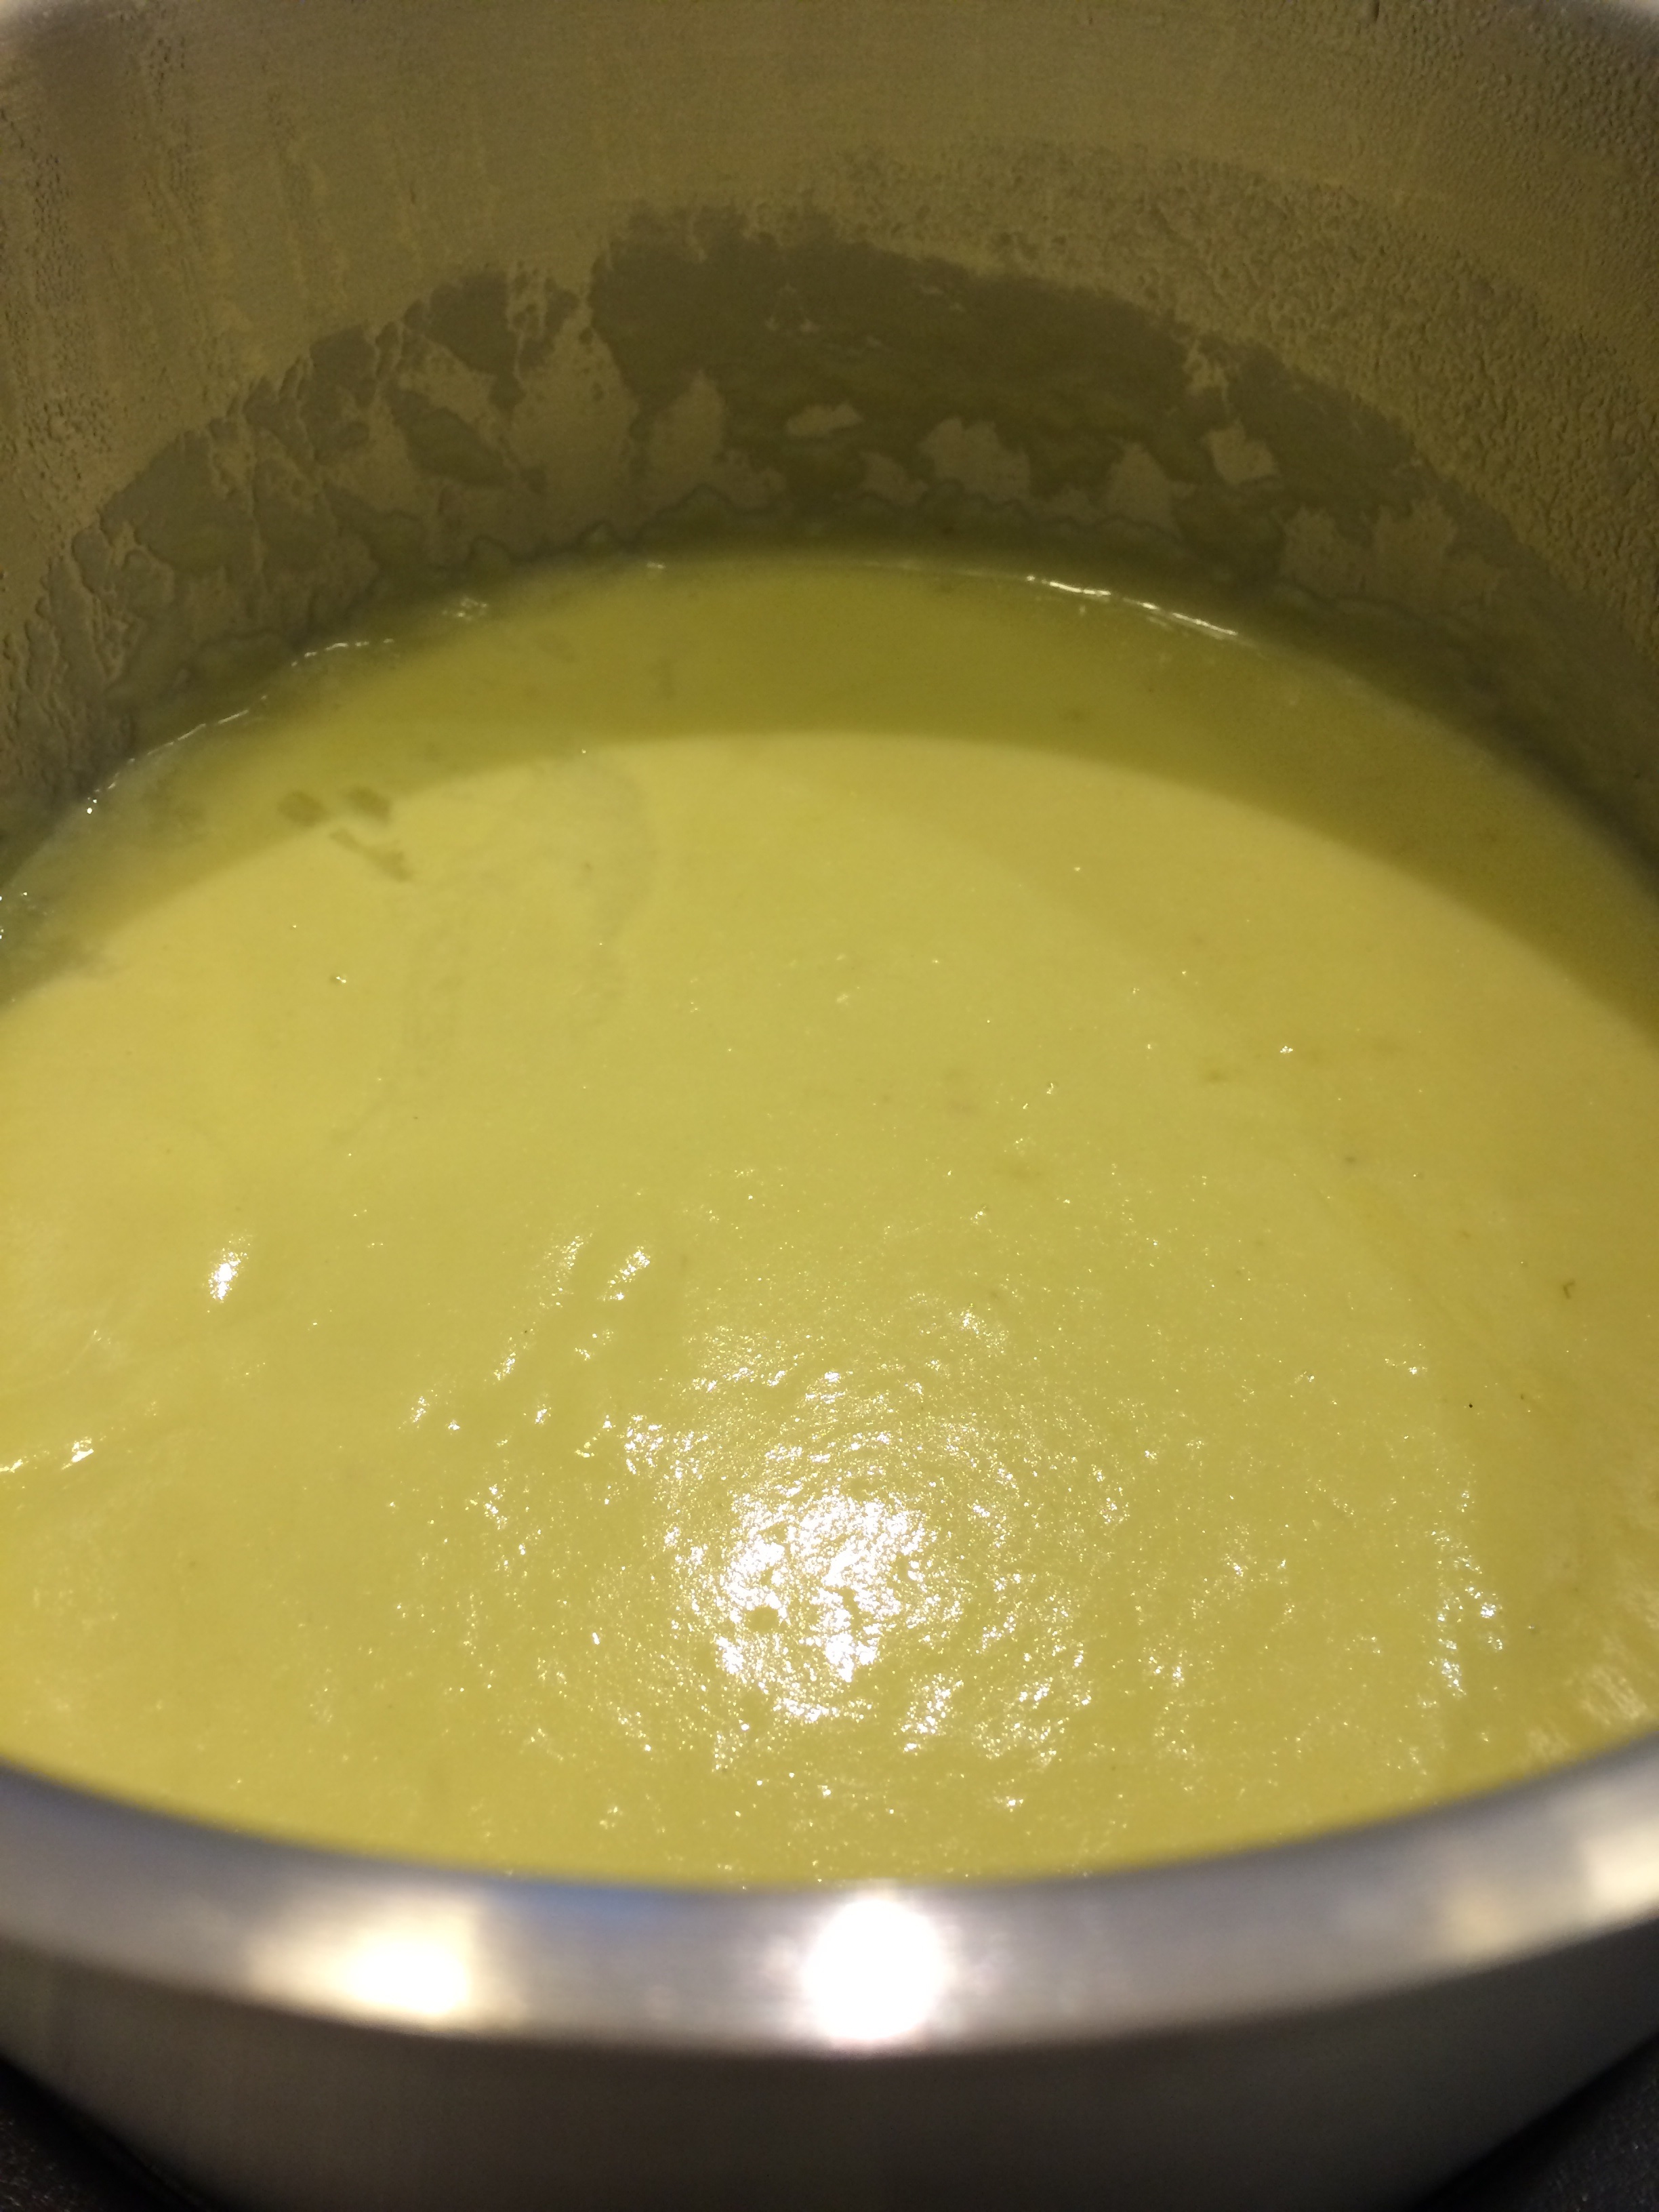
Minestrone soup ( delicious guided recipe)Leek and potato soup (guided recipe part of chicken velouté meal)
yummy leek and potato soup, mashed potatoes , steamed potatoes, chinese style stir fried vegetables; one of our favourite Thermomix recipes and our favourite stir fry to make. Simple and cooks in 7 minutes. I usually use a kg of fresh vegetables and cook for 9 minutes and it’s done, set and forget, tip into thermomserver to keep warm, stays crunchy for ages, love it!
Perfect mash potato
The Thermomix guided mash potatoes are super smooth, tasty and super easy to prepare. Simply put on the all ingredients, no water required, and set to cook. Lastly whip for a minute and that’s perfect mash potato every time.
Porridge topped with apple cinnamon and maple syrup
Breakfast is a breeze using guided recipes for crepes, American pancakes, pikelets, poached eggs, waffles and the loveliest creamiest porridge you could imagine. Honestly, the guided porridge is really really good, ready in 11 minutes no stirring, husbands favourite! It serves up a generous 5-6 people and topped with fresh fruit, cinnamon and maple syrup or honey, it’s incredible …. Husband keeps saying “wow” and “people would pay $15 for this at a cafe.” We used to microwave porridge but this is 1000% better. Miss 8 favourite breakfast is now Thermomix porridge.
Poached eggs using the guided recipe is messy and only allows for 2-3 eggs at a time. Our favourite go to recipe is sous vide poached eggs link below
The amazing thing about these poached eggs is you place the eggs with shell on into the steamer basket, and cook between 11-12.5 minutes at 70C. We set 12.5 minutes and use between 3 and 6 eggs depending on who wants eggs . It does take a little experimentation with timing to produce your preferred balance of cooked white and yolk but it’s super cool to watch everyone crack their eggs and watch the egg slide out whole. Note the eggs have to be cold from fridge and you can add boiling water to the TM bowl and wait for the temperature to reach 70C before putting the eggs in and setting the temperature to remain at 70C for the duration of the cook time.
The Thermomix recipe fail this week was a seafood paella ( forgot to add the key spice saffron), that looked quite uninspiring but was eaten all the same . It didn’t have the lovely yellow colour and flavour but was edible. This week, I cooked pork and apple casserole with the pressure cooker and a chicken and leek pot in the oven just so I didn’t forget some old familiars. Definately enjoyed dusting off the pressure cooker. Haven’t yet converted these to Thermomix recipes, maybe later.
Friday lunch was a Thermomix high…. A pot luck paleo lunch. My friends Steph and Fran prepared some amazing dishes with the help of their thermomixes and all using paleo recipes. On the table is the yummy satay chicken ( Pete Evans Family Food) fabulous Thermomix fish cakes , healthy Thermomix Beetroot salad, crunchy seed crackers with cashew cream dip ( Pete Evans Family Food) and the most refreshing cocktail, coconut water with ginger, mango, and mint. (Pete Evans Family Food)
Thermomix paleo lunch club
We traded recipes, thernomix tips and officially geeked out on Thermomix recipes and cooking! The food was exciting and inspiring. Can’t wait to do it again.
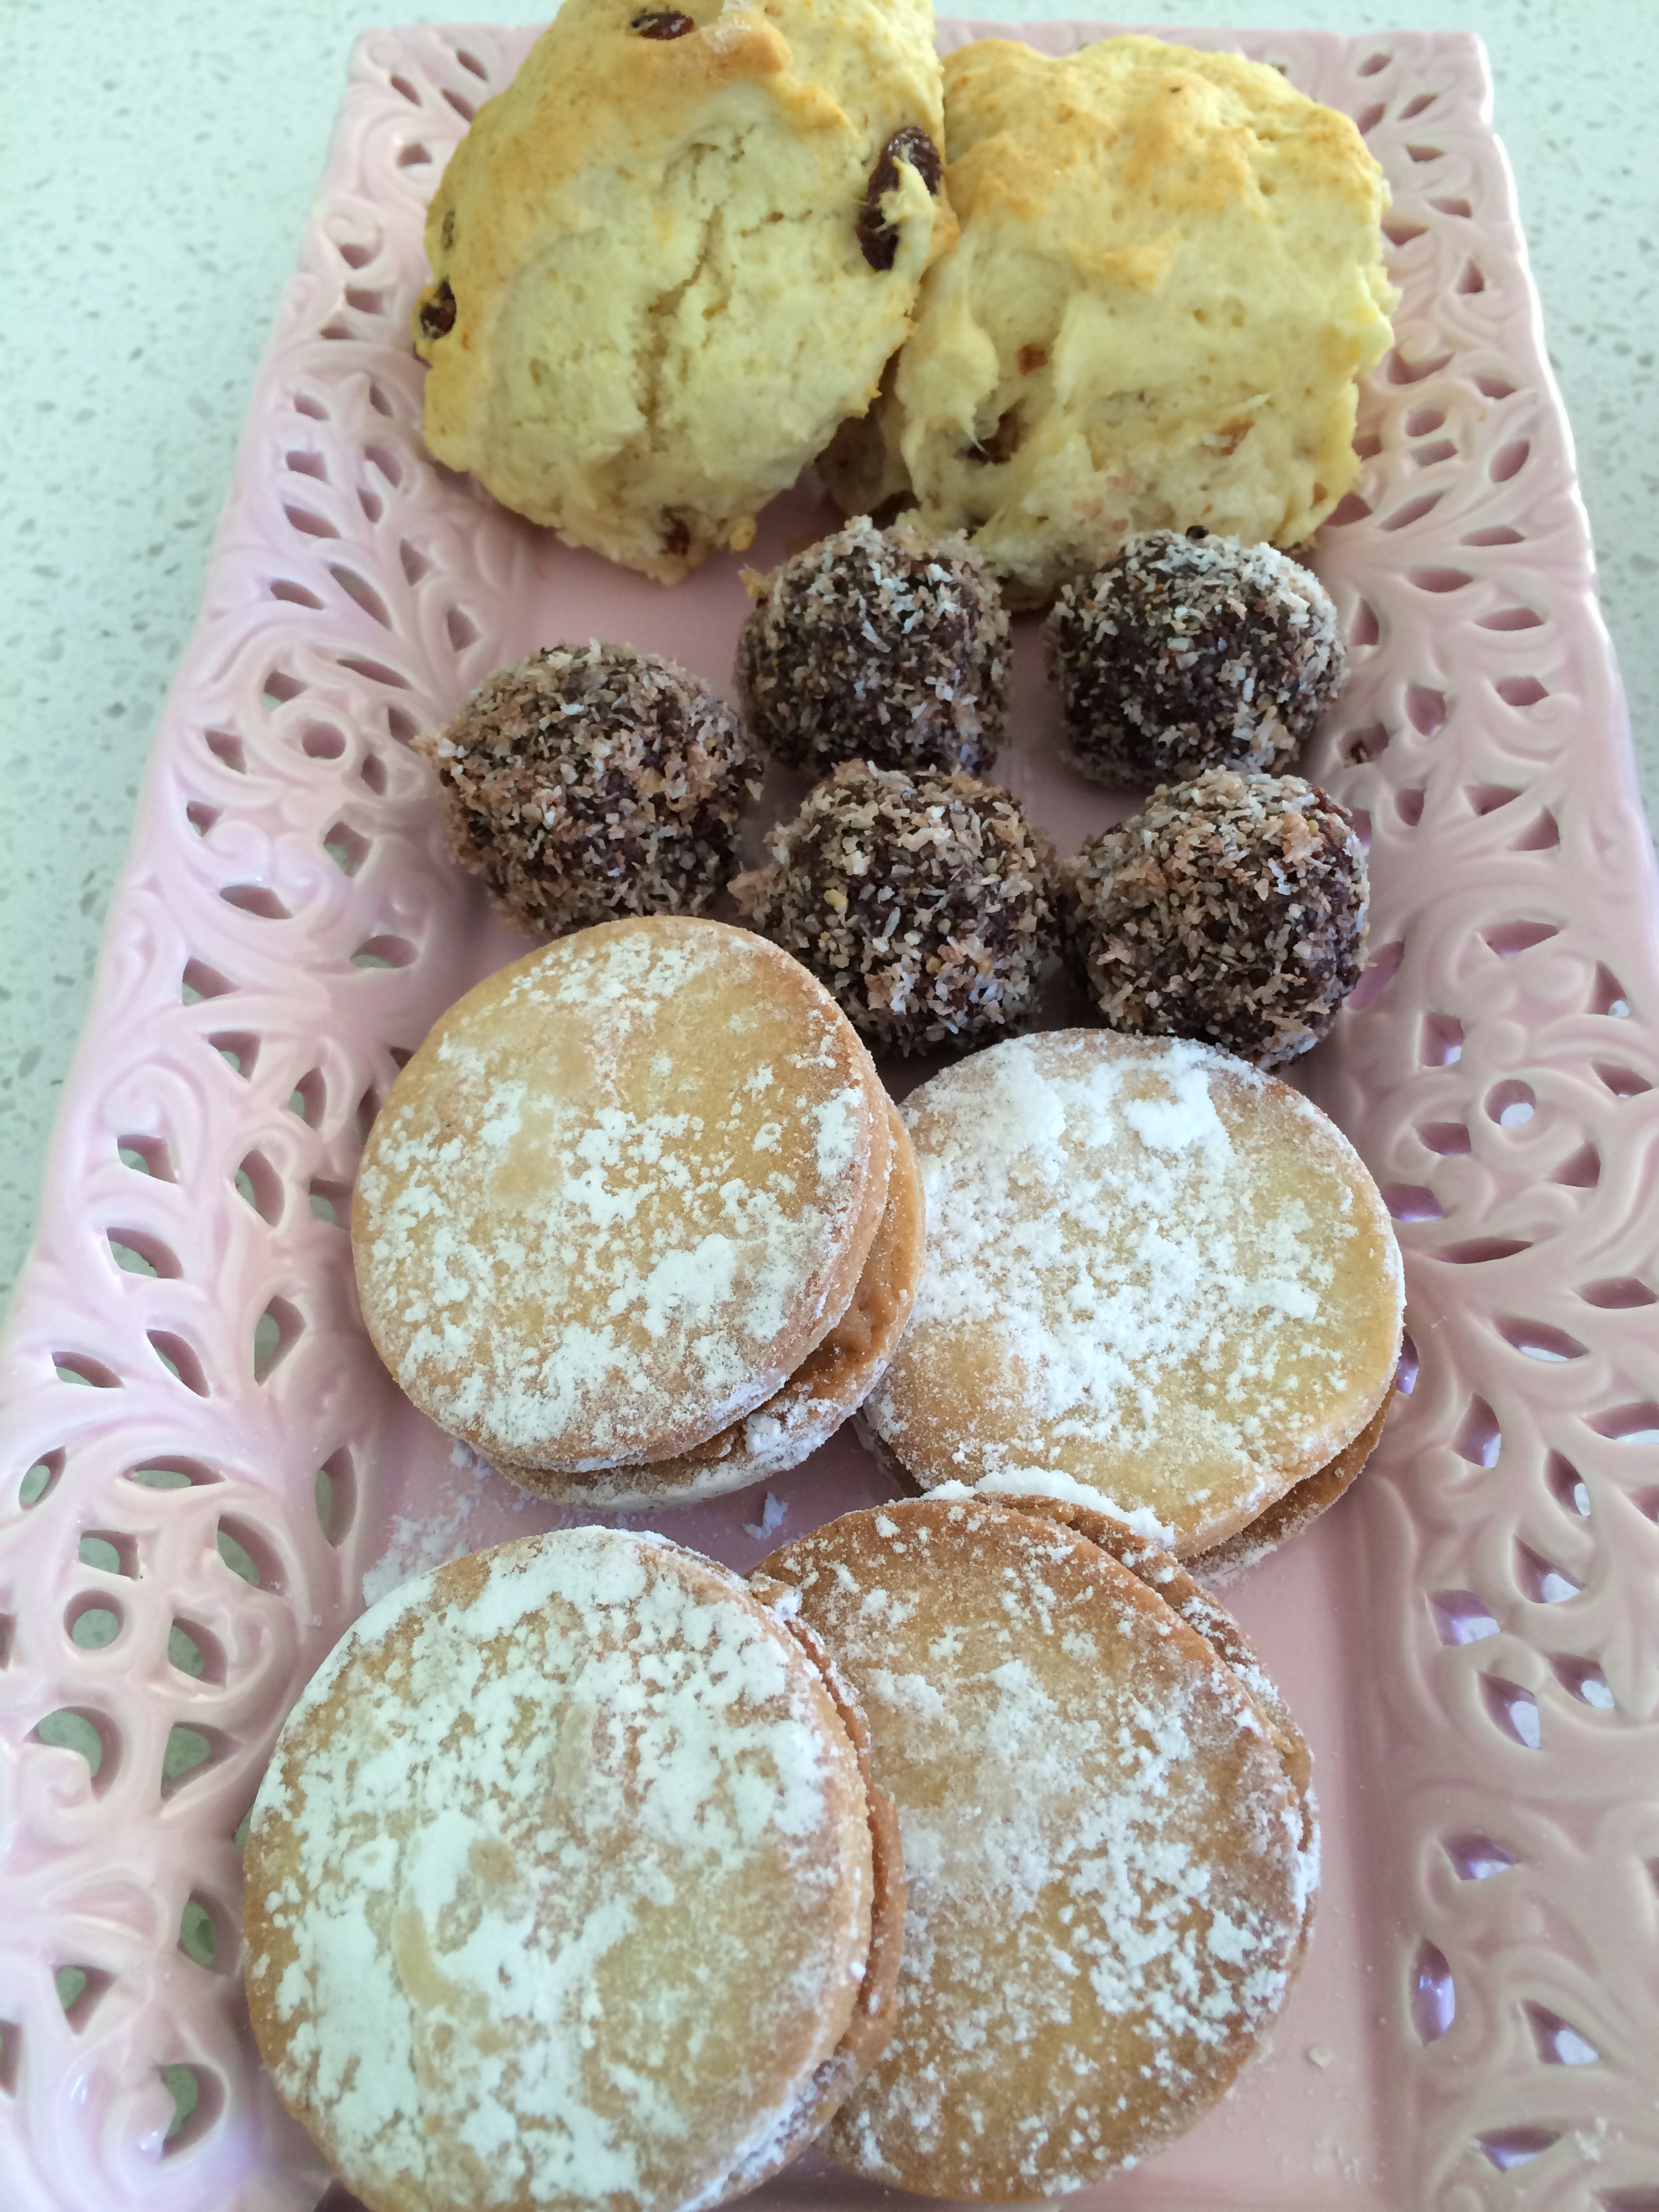
Shortbread, bliss balls and scones for dessert
And the finale for the week was dinner cooked by Miss 14. While I took Miss 8 to ballet, Miss 14 prepared Chilli con carne (guided recipe) guacamole (guided recipe ) with corn chips for dinner. The guided chilli con carne was awesome, so flavoursome with a spice base of cinnamon, coriander seeds, and cumin, she used trimmed rump steak pre minced in the Thermomix …( we like less fat in the mince)
Chilli con carne, guacamole, nachos, and side of beetroot salad
What a treat, dinner done by lovely daughter, dessert done, glass of wine for mum … Friday night is pretty perfect!
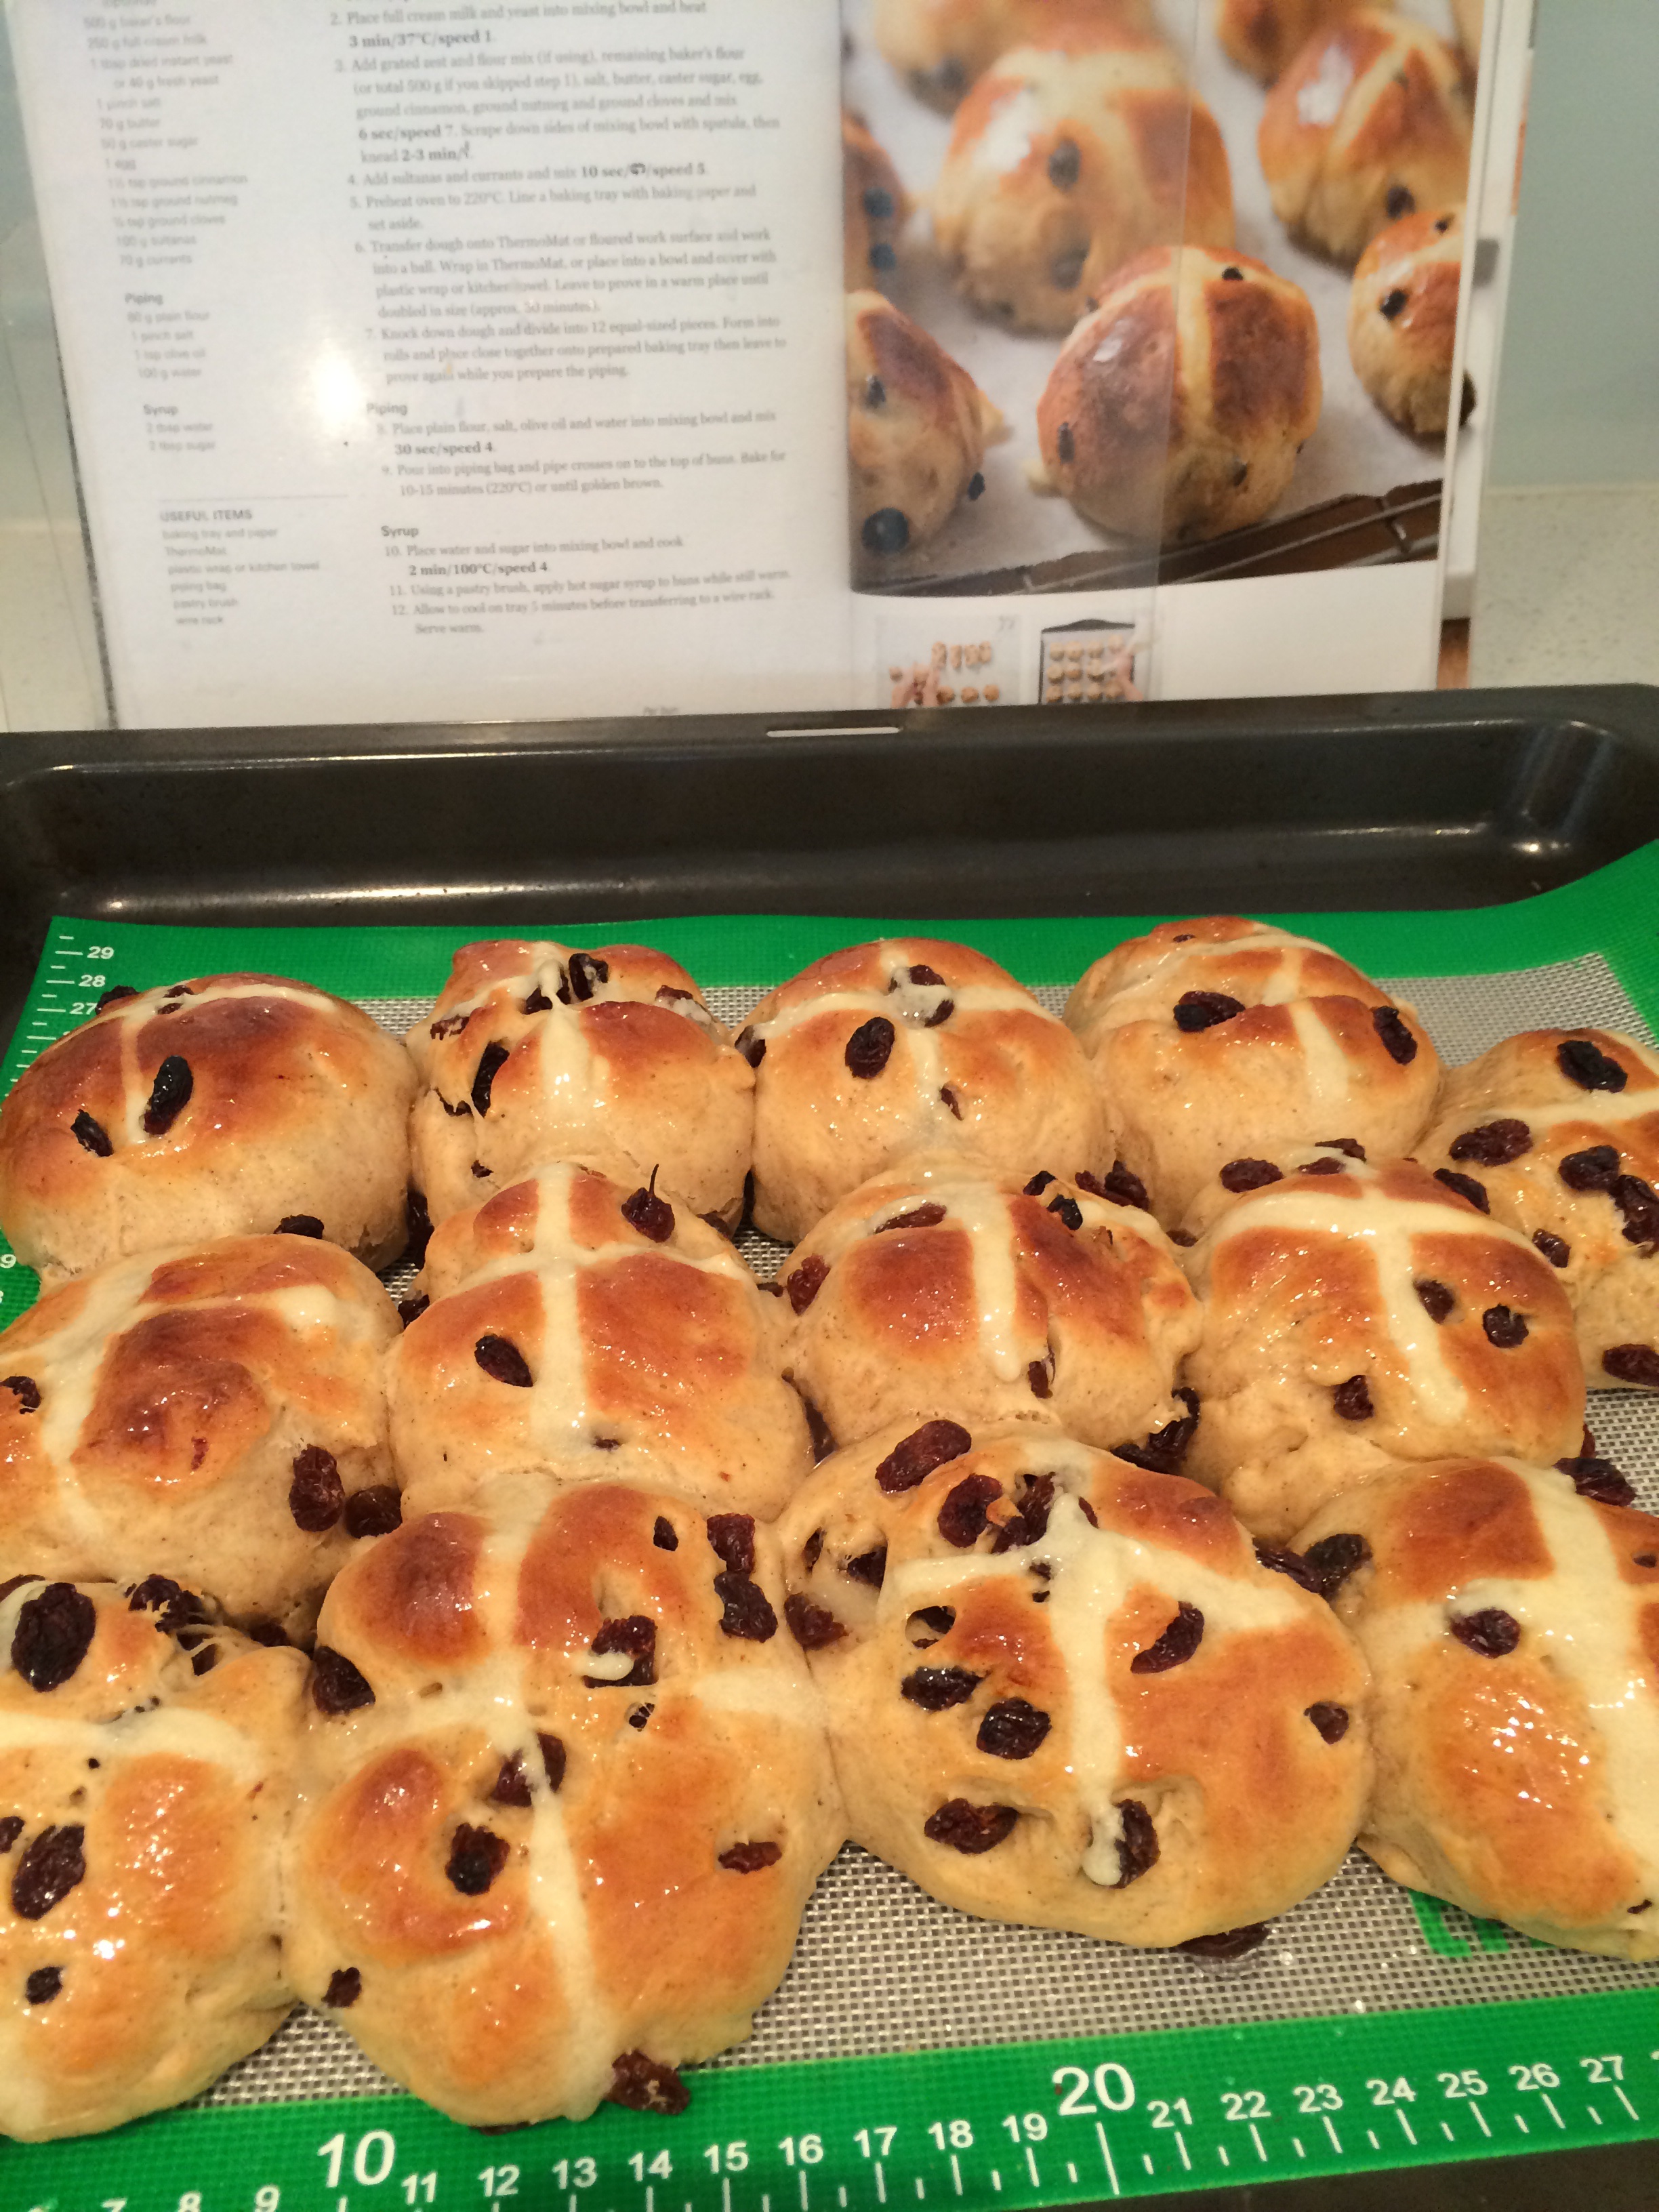
This is the final weekend of Easter school holidays, starting with some rain, lightning and thunder, it seems like perfect weather to treat the family with hot cross buns for lunch. Using the thermomix guided recipe from the Basic Cookbook, we are rewarded with these impressive looking scrumptious hot cross buns. Previously we had looked at the recipe and been put off by the extra elements of making the cross mixture and glaze but these were literally a ‘ piece of cake’ with the thermomix and they were ready in minutes. Kneaded dough in thermomix for 3 minutes instead of 2 minutes ( note BCB cookbook states 2-3 minutes, guided mode is set for 2 minutes ) , then left in the TM bowl to prove until doubled in size. It took longer than the recommended 1/2 hour, more like an hour because of the temperature drop coming into NZ cooler weather. Lemon zest (optional) and ground cloves were excluded because we had neither in the pantry. This didn’t effect the end result. Hot cross buns buttered for weekend lunch. Super yummy and better than anything we’ve ever bought. It’s starting to feel like any time the Thermomix is on the bench there should be something proving in it because a lot of these breads, rolls and baked goodies could be frozen and taken out for school lunches during the term.
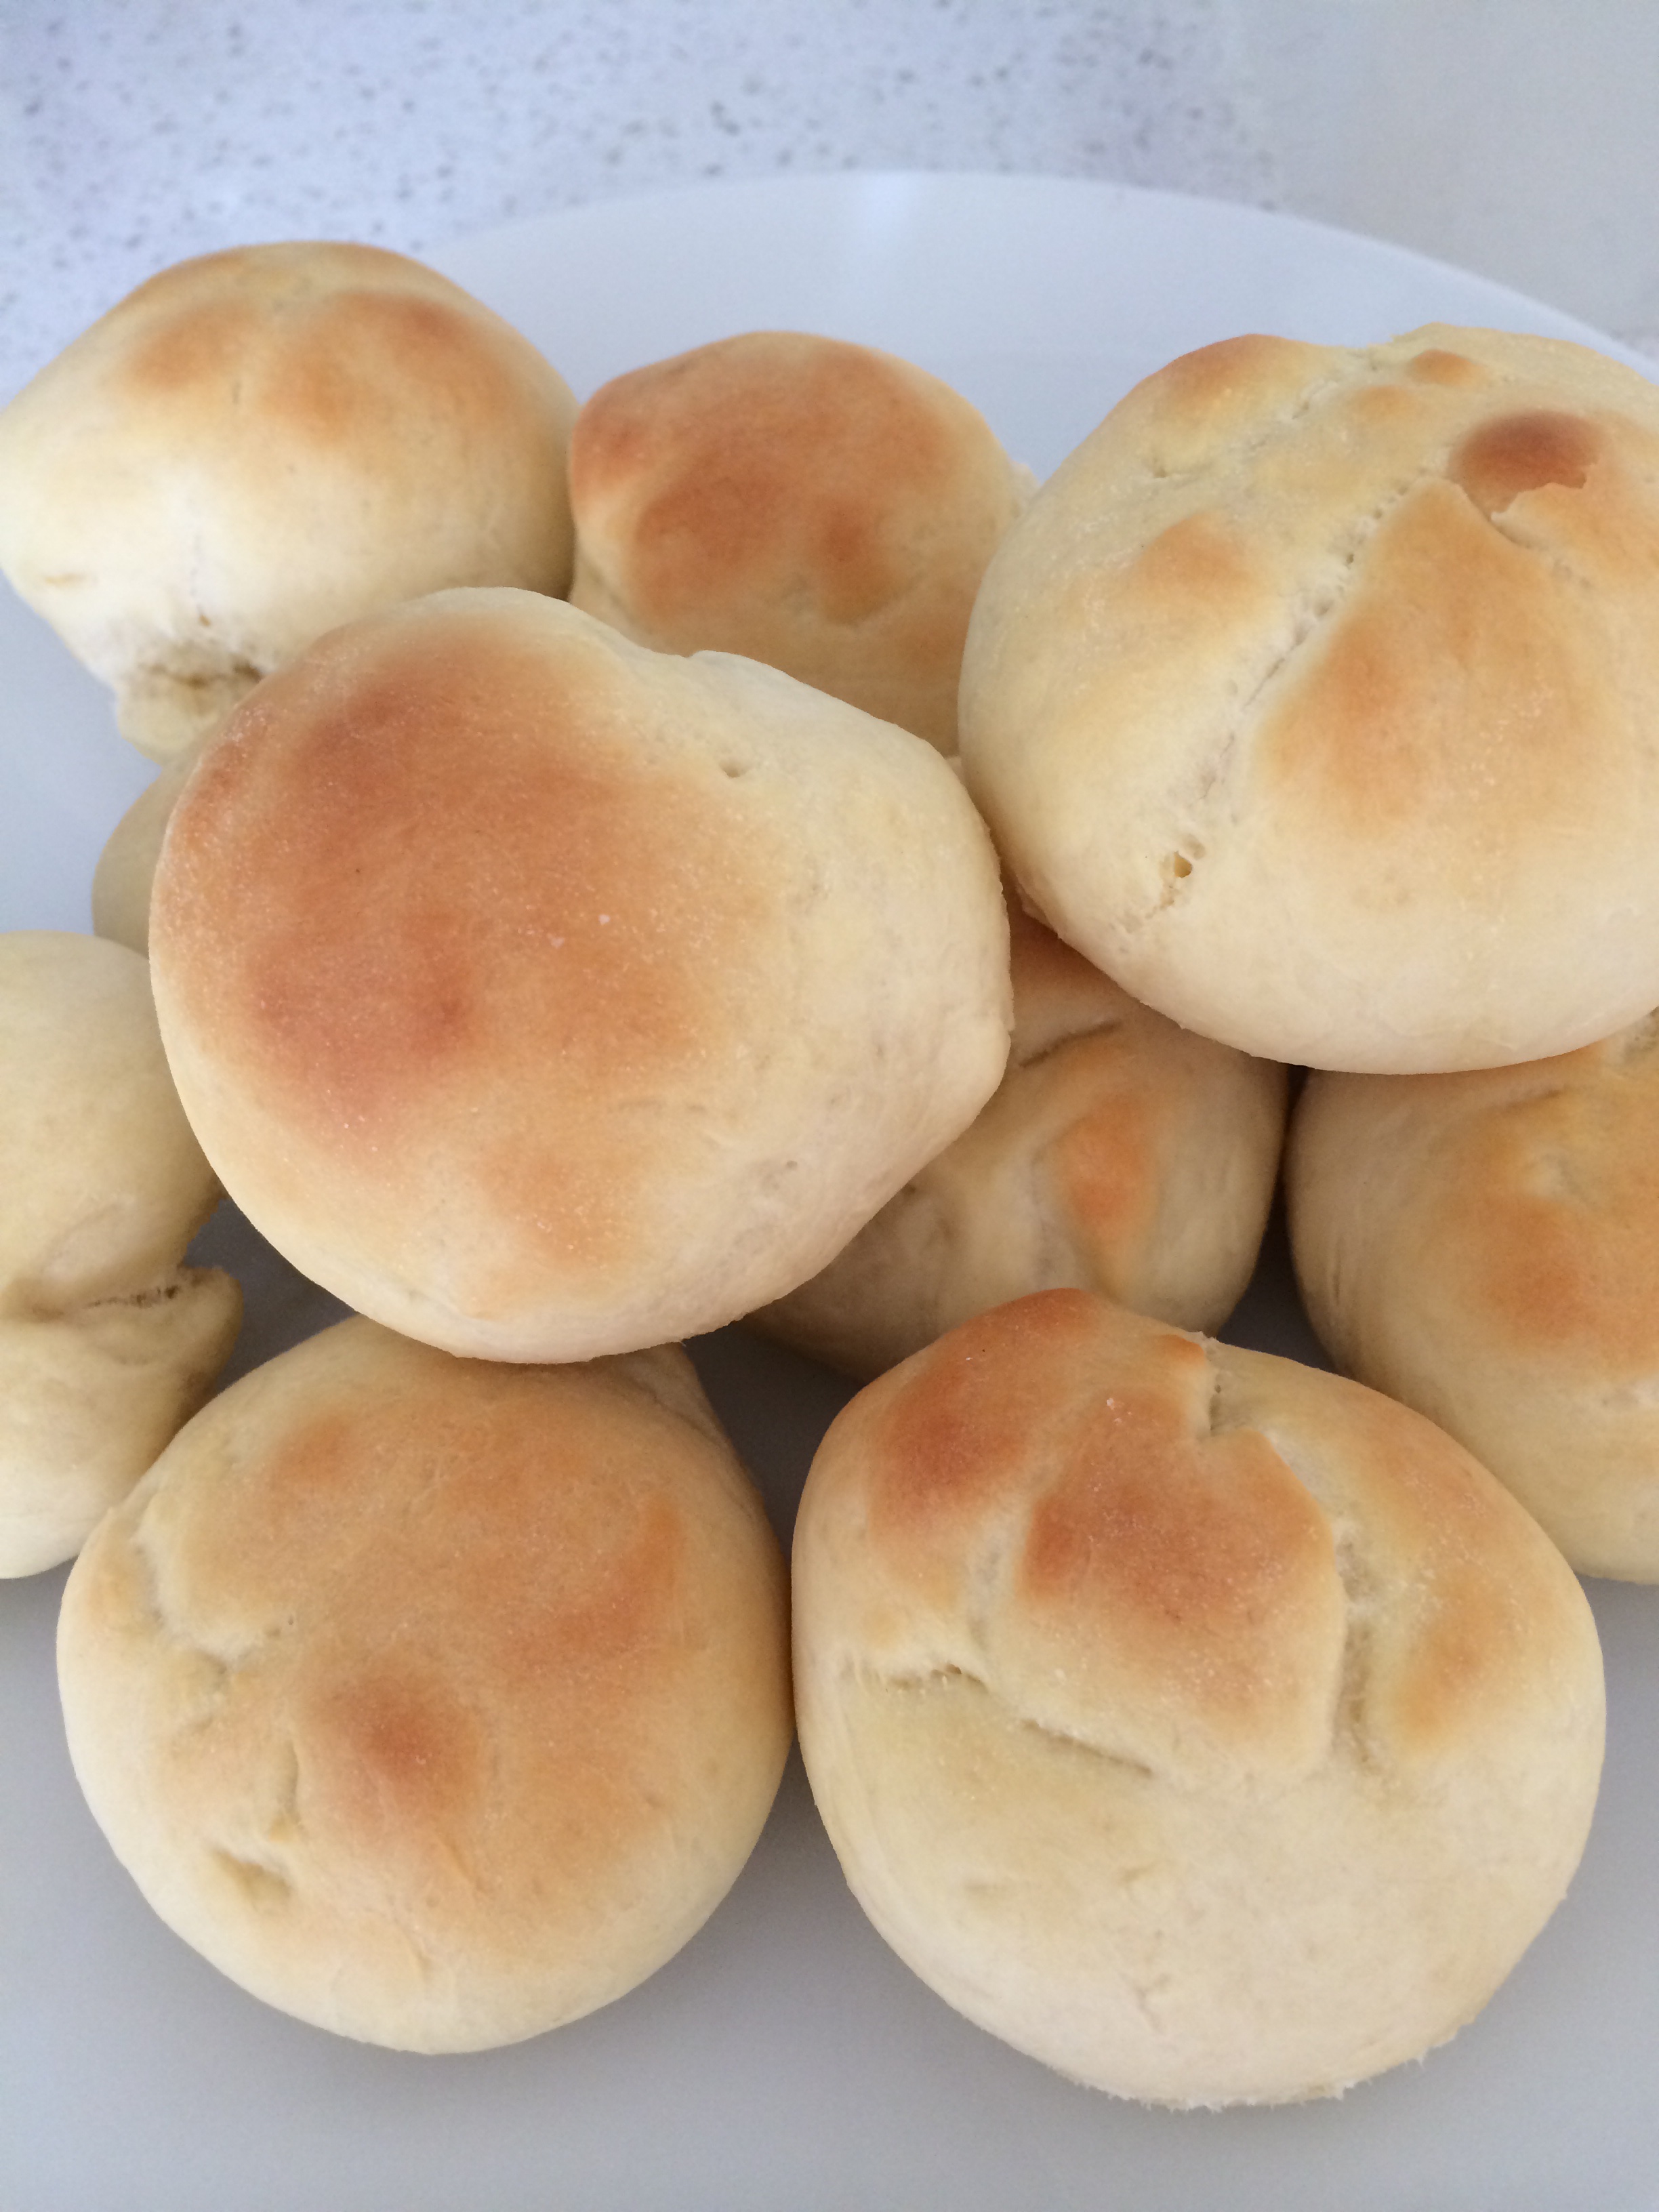
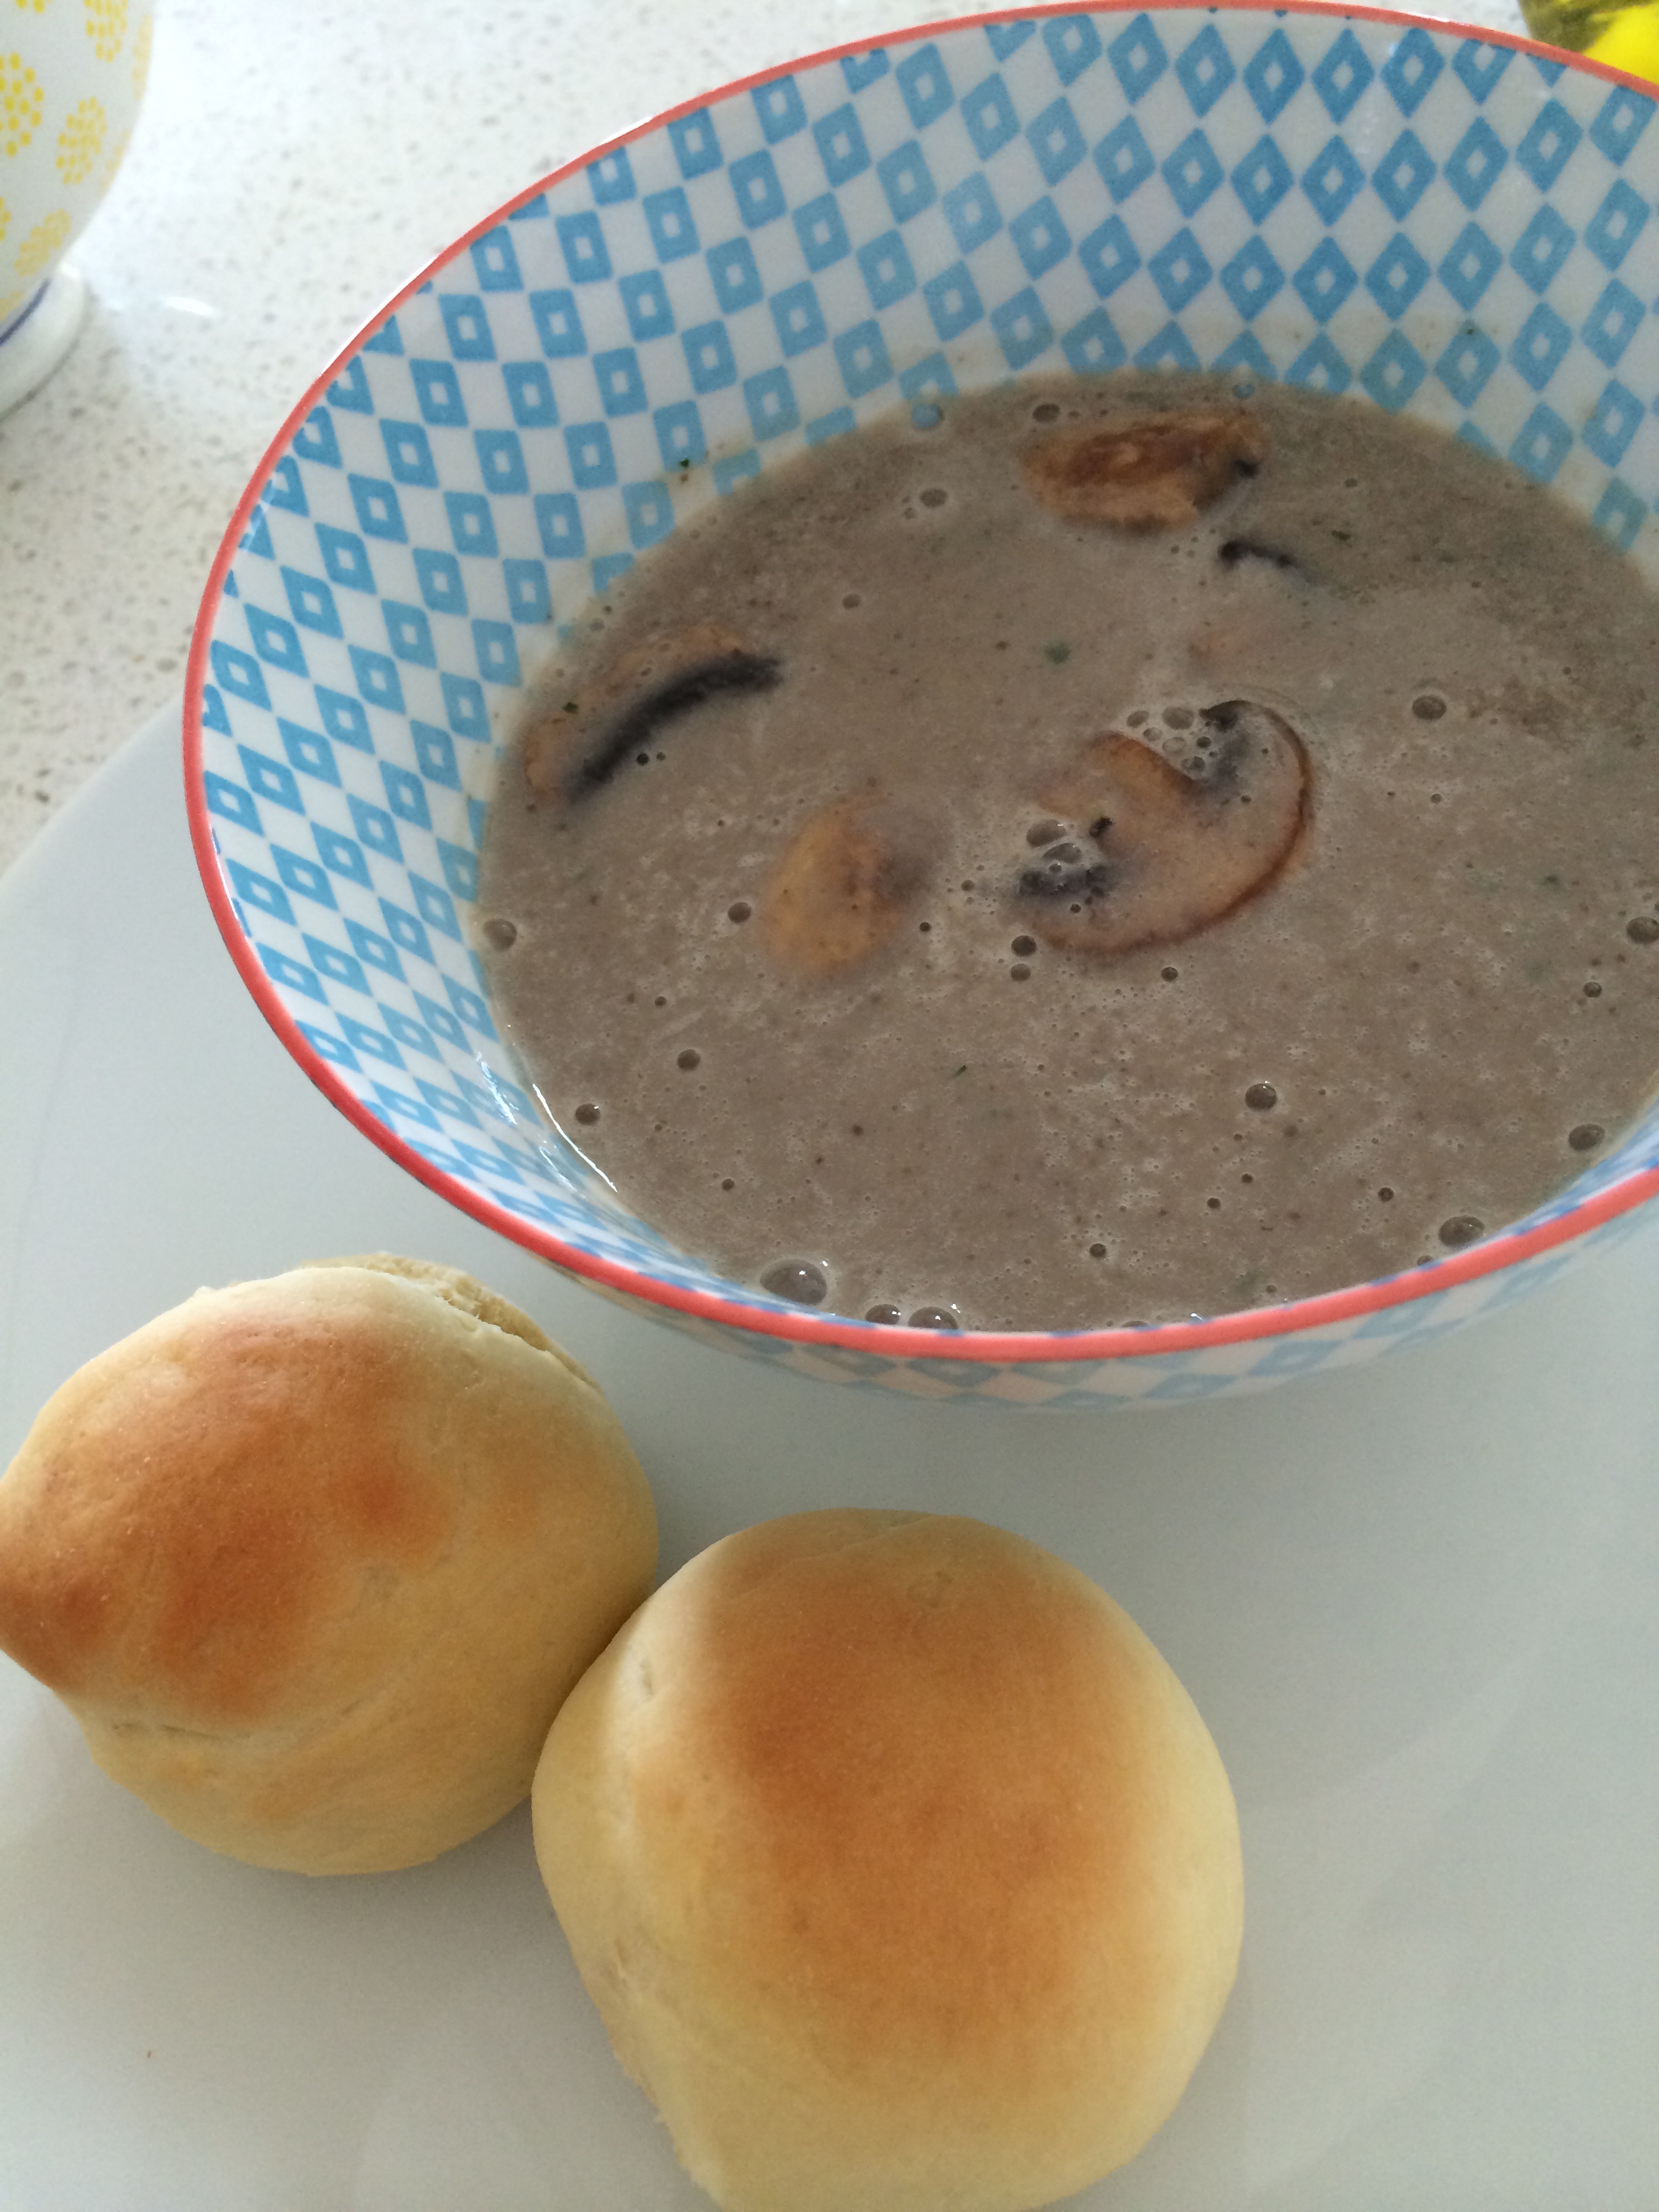
What’s for lunch. While I took miss 8 to the park and miss 14 went cycling with her Dad, the dough for these buttery rolls ( guided thermomix recipe) was proving for an hour in the thermomix. The second proving after the rolls are placed on the tray makes all the difference to a softer texture and smoother shaped bun. The first few times we made the buns we couldn’t wait for a second prove and put them straight into the oven but now after waiting for a second prove it’s definately worth the wait. The dough makes quite a large batch, probably around 20 buns, so it’s better halved after the first prove and the dough can be saved in the fridge for use another day. I had to substitute light milk for buttermilk because I had no buttermilk. ( I have substituted milk for buttermilk in all the thermomix recipes tried so far too with no detrimental effect to the recipes) And yah, pleased to say the these buns were still excellent with this substitution. They also seem to stay fresher and softer for longer than after a single prove. The smell of these buns baking in the oven is mouth watering and while the buns were baking in the oven threw the ingredients into the thermomix for mushroom soup which was ready in 10 minutes. Hot butter rolls and creamy mushroom soup served ..yum yum.
Last night we had takeaways, not by choice, and straight after miss 8 said ” I don’t like this food can’t wait for tomorrow when we can eat thermomix food”. That’s pretty amazing to hear from a child. I think the freshness of the food, and just knowing it’s come straight out of the oven and onto the plate, gives them such a sense of wellbeing. The thermomix is helping us establish healthy food habits of a lifetime.
Yah… Homemade bagels made for Sunday brunch. The dough was mixed and kneaded in the thermomix within 3 minutes then left to prove. Then shaped into doughnut shapes and dunked in boiling water and then baked for 15 minutes. Note: we just added some boiling water to a bowl and dunked both sides of each bagel in the water for 30 seconds alternately. 480 gm of flour in the recipe made 8 bagels. Texture fantastic. Eaten fresh from the oven with ham, cream cheese, and salad. The recipe is from the a thermomix recipe app, “robo gourmet thermomix” But have found a recipe on the super kitchen machine blog which is almost the same except for the addition of a small amount of butter 25gm in the blog.