What to do with the leftover Easter eggs we have in the pantry. Use them up in rice bubble slices! Tried two easy recipes and modified them to suit. The Traditional slice pictured first was made trying to smooth the chocolate over the top and is a little crumbly because it was hand mixed. I’ve adjusted the recipe to follow the thermomix method used for the Peanut Butter slice. Melting chocolate first to put into the baking tin is much easier because it’s tricky to spread chocolate over unset rice bubbles. These recipes take 5 minutes to make with the thermomix and then pop straight into fridge to set.
Traditional Rice Bubble Slice
125g butter
80g sugar
200g chocolate ( approx 1 Easter bunny)
4c rice bubbles
Line a slice tin with baking paper.
Break chocolate into pieces and melt in thermomix, 1.5 minutes, 70c, speed 3.5. Spread melted chocolate into the slice tin onto the baking paper.
Add sugar and butter to TM bowl 5min Varoma temp. speed 2. Add the rice bubbles to the TM bowl and mix for 1 minute 20 seconds reverse speed 1.
Pour the rice bubble mixture into slice tin on top of melted chocolate and use a metal spoon to spread across the tin and push down firmly.
Place in refrigerator for an hour until set, then slice.
Peanut Butter Rice Bubble Slice
Peanut Butter Rice Bubble Slice
3 cups of Rice Bubbles
½ cup of rice malt syrup
120g (½ cup) of smooth peanut butter
200g of milk chocolate( approx 1 Easter bunny)
Line a slice tin with baking paper.
Melt chocolate broken into pieces in thermomix, 1.5 minutes, 70c, speed 3.5. Spread melted chocolate into the slice tin onto the baking paper
Add syrup and peanut butter to TM bowl 5min Varoma temp. speed 2. Add the rice bubbles to the bowl and mix for 1 minute 20 seconds reverse speed 1.
Pour the rice bubble mixture into the slice tin on top of the melted chocolate and use a metal spoon to spread across the tin and push down firmly.
Place in refrigerator for an hour until set, then slice.
The kids raved about the Peanut Butter slice, said it tasted like Reese’s Peanut Butter cups. Put into freezer bags after they’ve set, ready for lunchboxes and treats during the week. Better than buying the supermarket ones and you can reduce sugar accordingly to your taste.
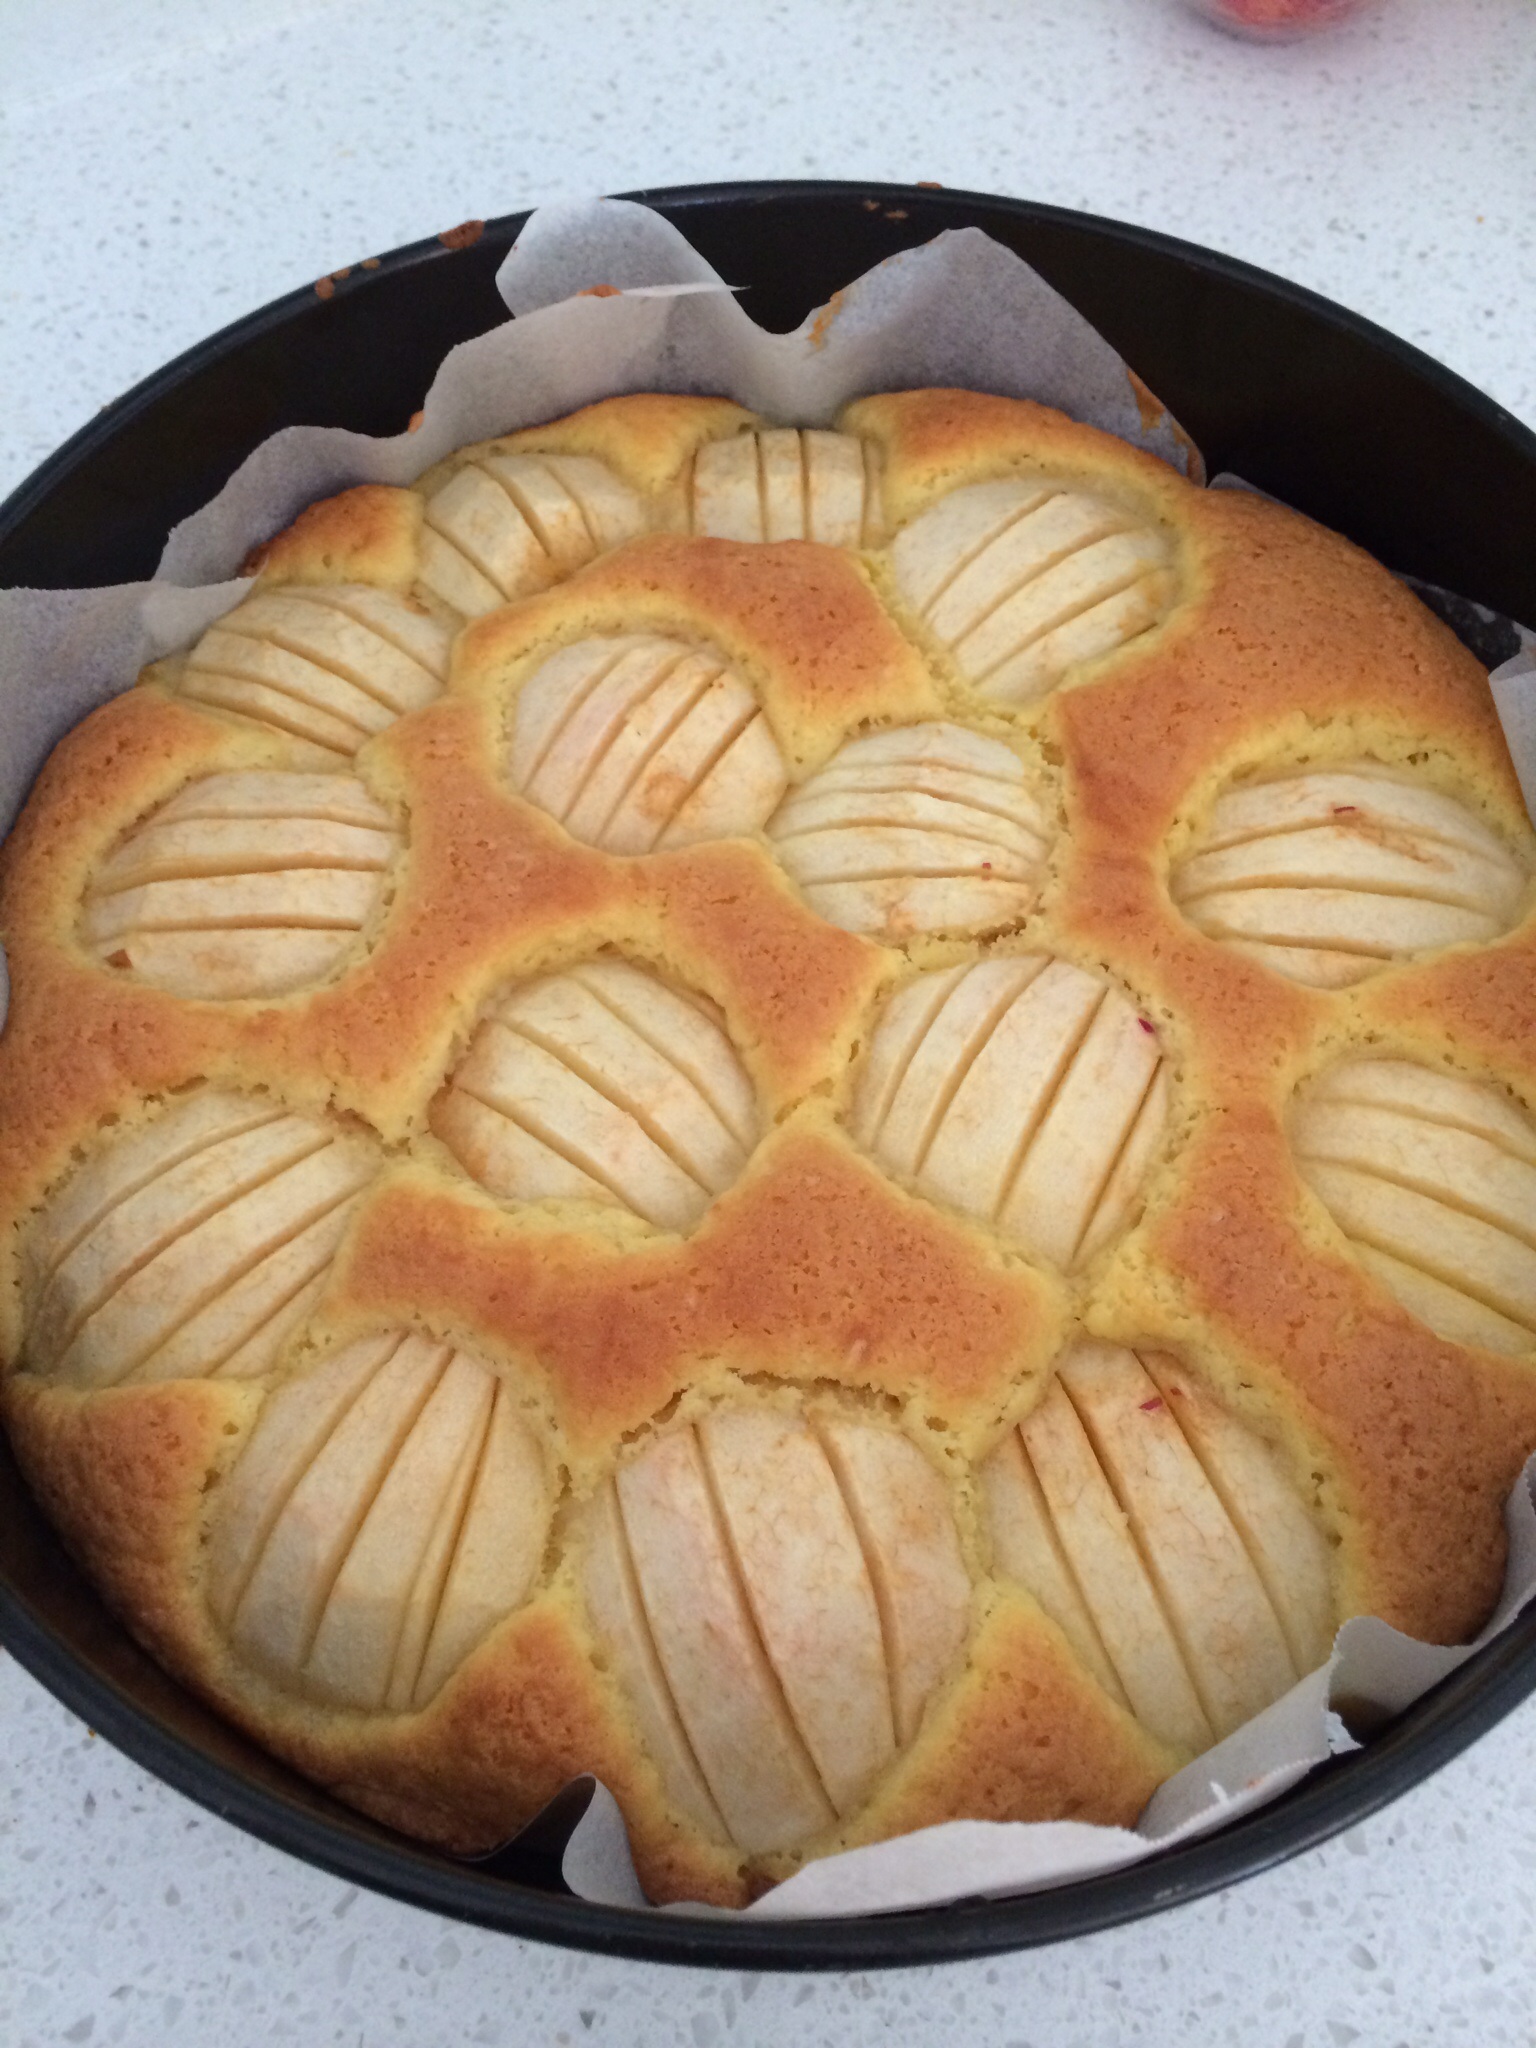
The guided recipe for apple cake is so simple and here is the result….a lovely tea cake, deliciously light and crisp on the top. It’s done in 20 seconds in the Thermomix and the only hard part is peeling and quartering three apples to lay on top. The sponge is light and the apples are soft but still firm. Can imagine with whipped cream, it would make an awesome dessert. This afternoon dinner is cooked (sweet and sour fish) mac and cheese with tuna cooked for kids afternoon tea and this apple cake made for lunchboxes. Would not have attempted more than one of these dishes before we had the Thermomix. Even had time to clean up the kitchen while the Thermomix did all the work. Notes for next time : no need to push apples into cake or reduce sugar, use four apples instead of three.Some apples work better, pacific rose too crunchy and granny smiths too tart, gala works well, best not to slice too thick so the apples soften while cooking.
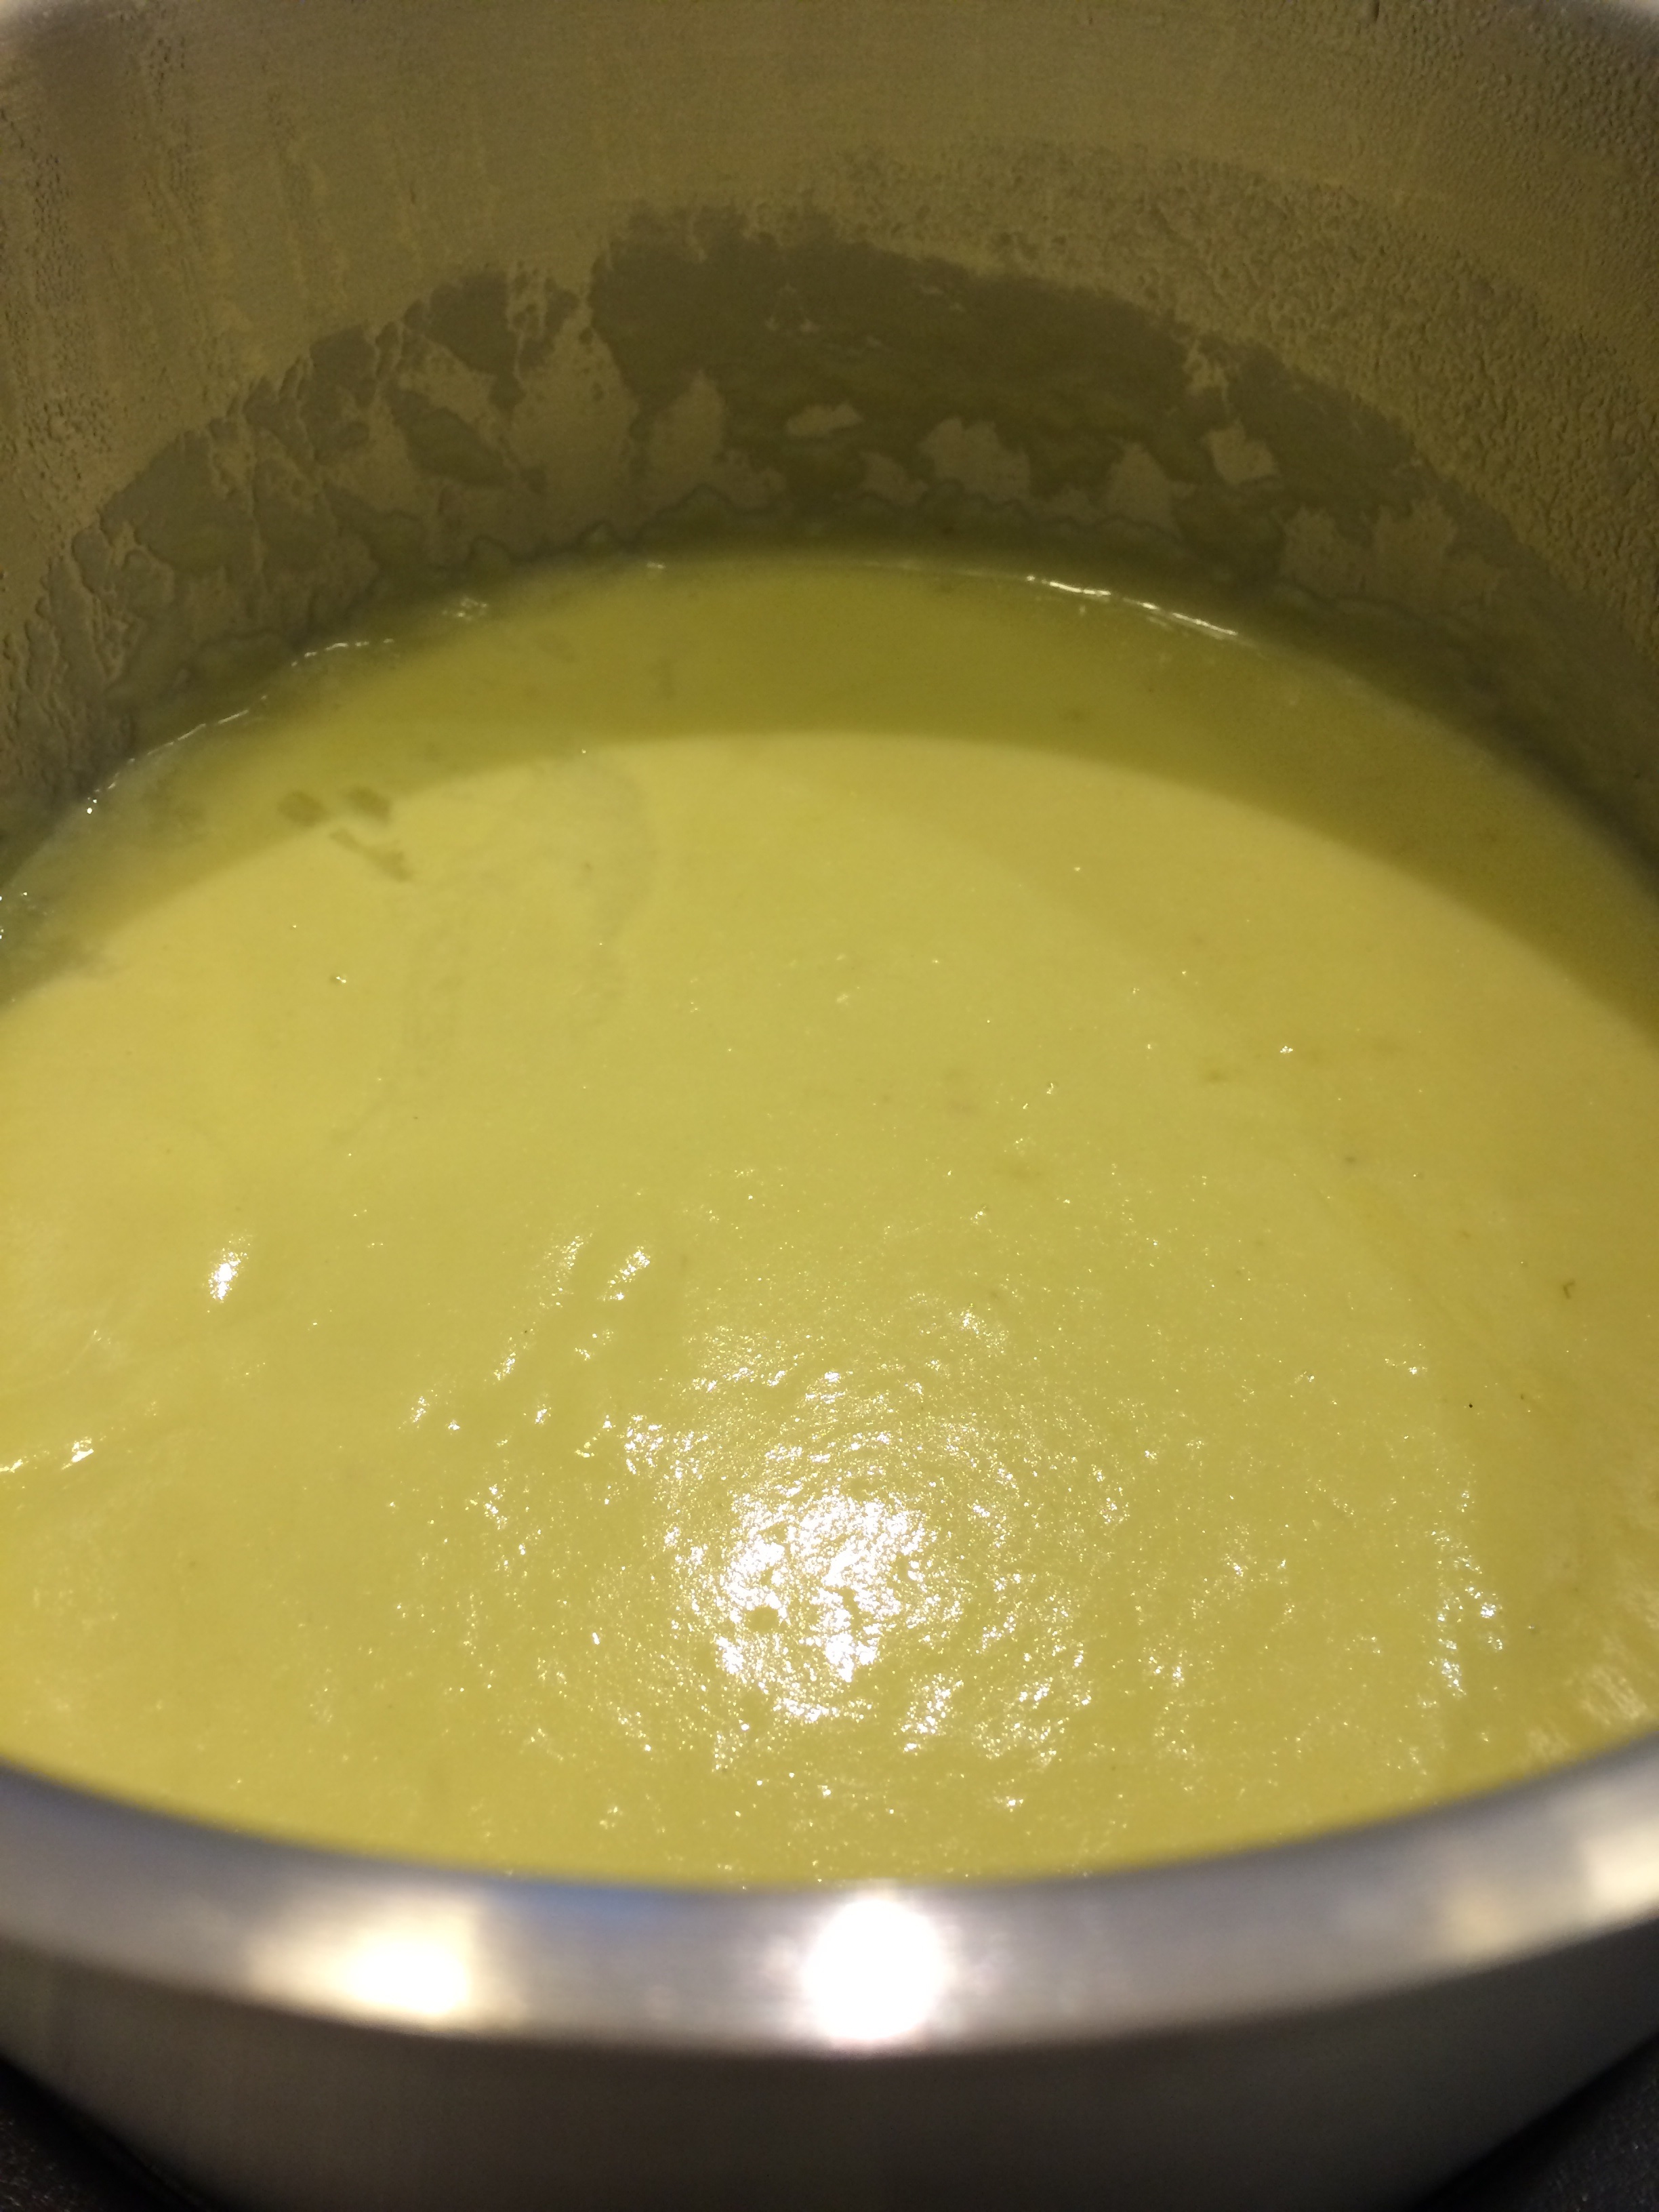
Thermomix guided creamy tomato soup is perfect for kids afternoon tea. Requires 700g of fresh tomatoes, garlic, onion, tomato paste, vegetable stock and fresh herbs. Used milk instead of cream and sweetened a little more at the end because the tomatoes weren’t very ripe. Cooked in 12 minutes. Served with grissini dipping sticks. The kids love these sticks ! Made grissini from the pizza dough recipe flavoured with chopped garlic and rosemary, brushed with olive oil and sea salt before baking for 10 minutes at 200c. The other half of the dough was rolled less thinly and snap frozen for lunch boxes.
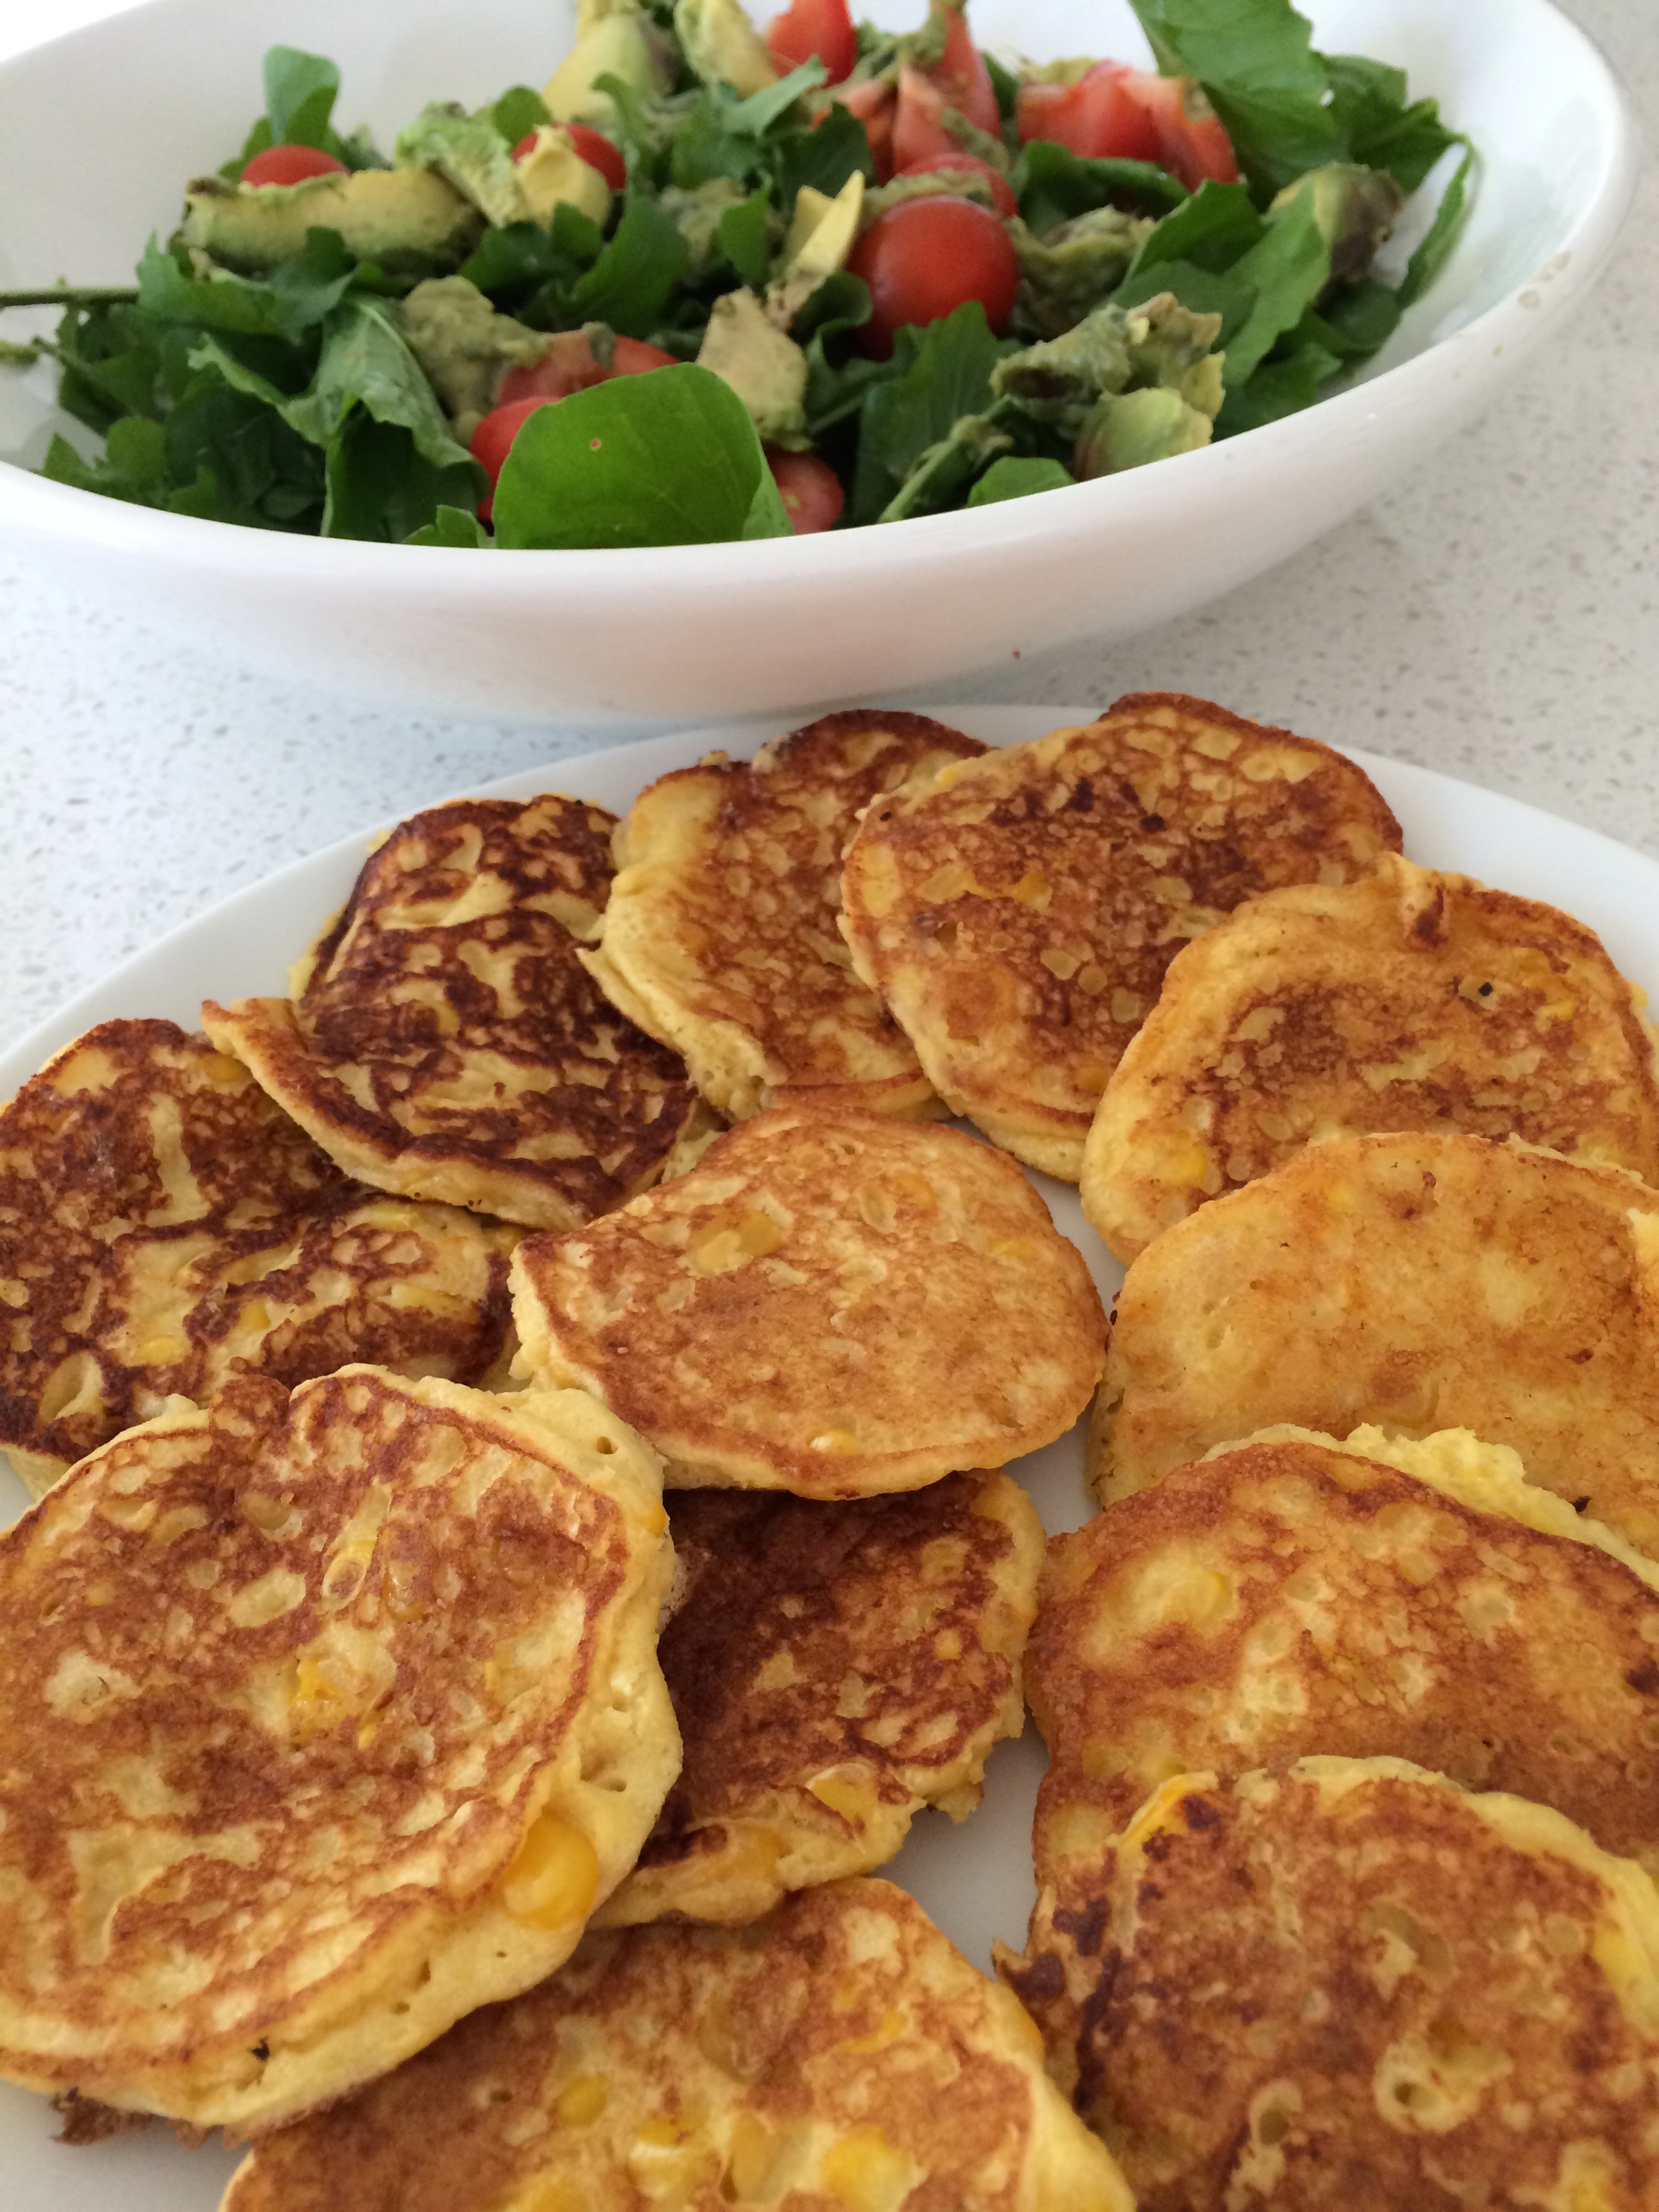
Our favourite sweetcorn fritter recipe. Easy Sunday lunch, with rocket salad. Kids love Pete Evans green goddess dressing and eating lots more salad and taken a liking to the peppery taste of rocket which we have growing in abundance in the garden. Pre Thermomix days, nothing edible would grow in the garden usually from lack of watering and feeding. But it’s amazing how our focus on healthy eating has somehow transformed a bare herb garden into something that adds regularly to our meals. More than ever before determined to keep replanting herbs and loving the fact we can go pick some greens straight from the garden for our salads.
Sweetcorn fritters
2 eggs
1/4 c milk
3/4 c self raising flour
1 can creamed corn
1 can whole kernel corn, drained
salt and pepper
Separate egg yolks, place eggs whites into TM bowl with butterfly and beat speed 3.5 till fluffy and set aside
Add yolks, milk, flour, corn, salt and pepper blend in reverse speed 3 until combined
Fold in egg whites to mixture and fry tablespoons of batter over medium heat, turn over when mixture starts to bubble.
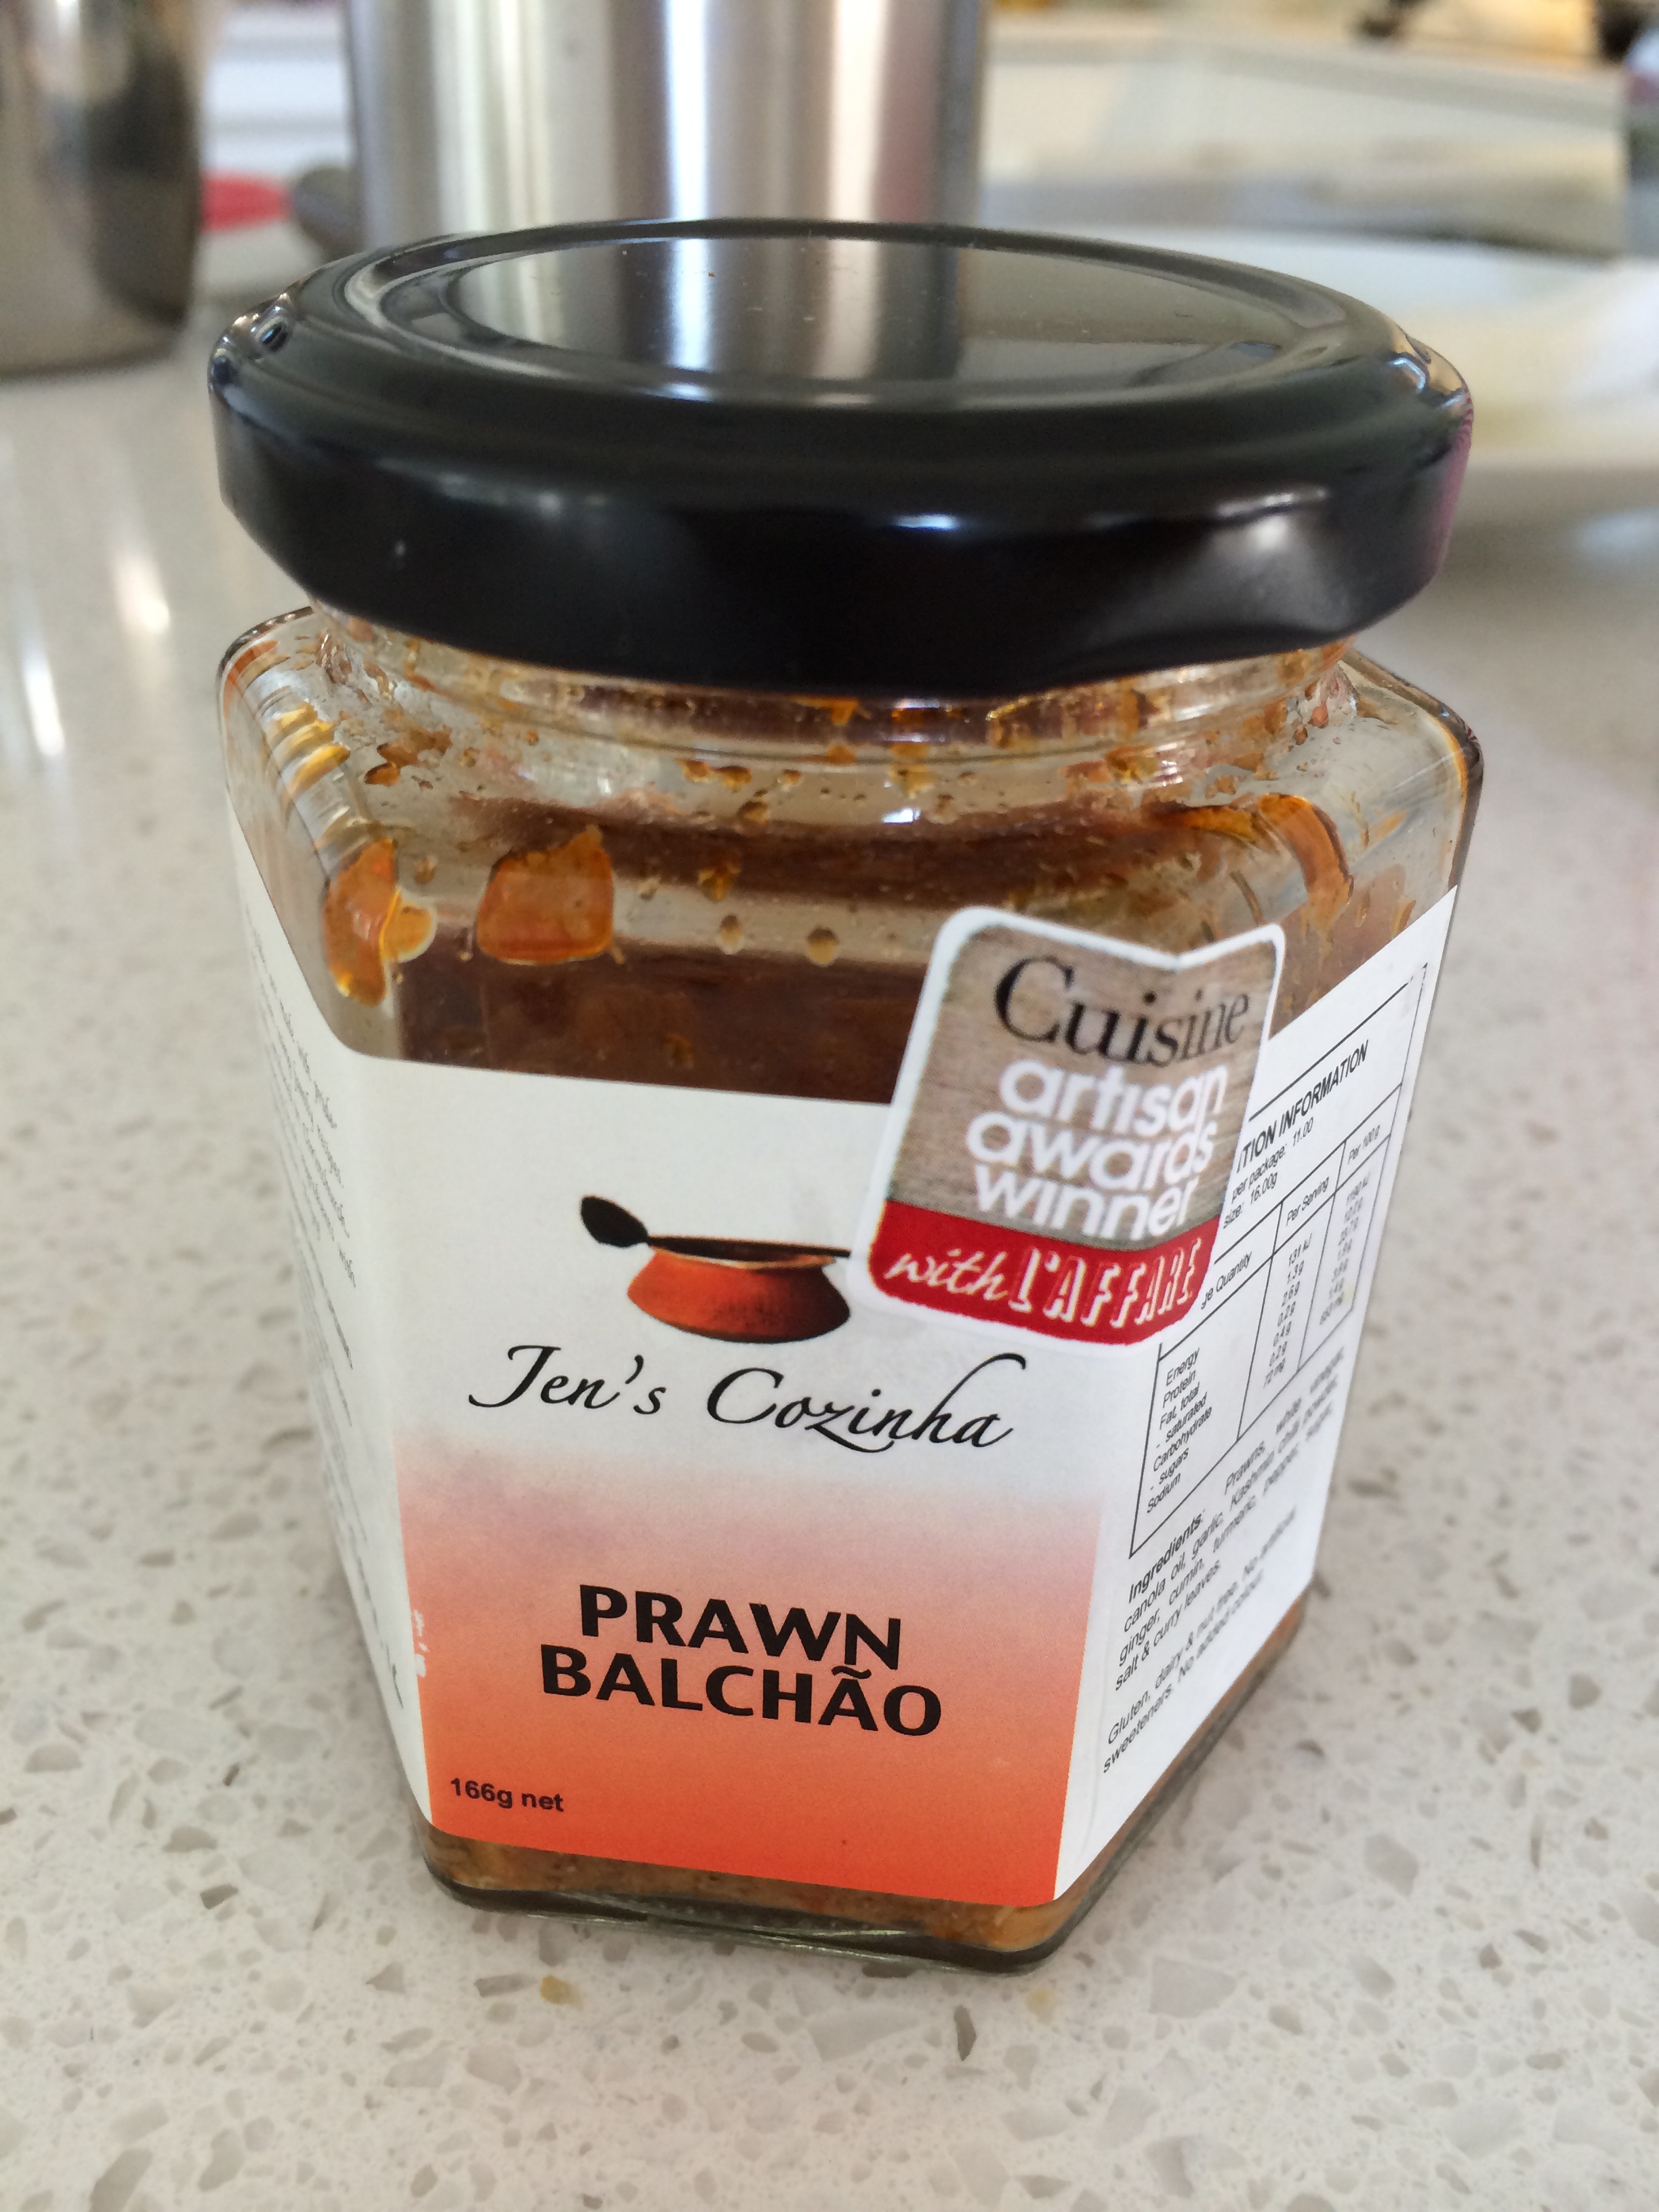
What takes this ordinary fritter into something with a bit more kick is this artisan pickle which we bought from fabulous Farros. At $20 a jar definately a treat, but it’s homemade and an award winning prawn balcháo. The Kashmin chilli and curry leaves provide a bit of heat and warmth to our lunch.
Coconut twists are are an old family recipe. My mum and aunty have made these for as long as I can remember and they evoke special childhood memories. Eaten straight from the oven , sticky crunchy coconut dotting the floor as the children sneak them off the tray when mum wasn’t looking. They were so good, when my mother and aunt opened a lunch bar in Queen Street in the 1970’s, they were a top seller. You can buy them in the Asian bakeries now but they’re the mass produced kind. None can rival that homemade taste and texture. Each roll slightly different from the next depending on how it was twisted and how much coconut sugar peaks out from each twist. And now the recipe has been published in Natalie Oldfield’s latest cookbook, “Love and Food at Grans Table”, a beautiful collection of grandparents recipes. Thanks to my dear cousin for sending in my aunt’s treasured recipes.
Converted the recipe for the Thermomix and oh my goodness, they’ve turned out fabulous. For some reason there’s alot of coconut sugar left over after rolling and making the twists so they weren’t sweet enough, next time I’ll melt the butter into the coconut sugar instead of buttering the rolled dough and sprinkling over the top. 6 1/2 cups of flour makes three trays of buns.
The kids came home from school to these wonderful twists on the table and gave them the thumbs up. I am literally jumping up and down with joy, a recipe is preserved for the next generation.
Coconut Twists
125 g butter
1 c milk
3/4 – 1 c water
1/4 c sugar
3-4 tsp dried yeast
2 eggs
6 1/2 c flour (810g)
1 tsp salt
Coconut Filling
2 c coconut
1/2 c sugar
90g butter
2 tsp vanilla essense
Method
Combine and melt butter, milk and water in tmx – mix 2 mins, 50c , speed 2.
Add yeast, sugar- mix 2 mins, 37c , speed 1. Leave 10 minutes. ( yeast will activate and froth)
Add other ingredients. Knead on dough mode 4 minutes.
Leave dough in warm place till doubled in size.
Punch down dough, roll out to into a large square. Mix filling ingredients and put the coconut filling on half the square and fold dough over. Cut into strips 4 cm wide twist twice and set onto lined or greased baking trays. Cover with tea towel and leave to rise until they have doubled in size.
Preheat oven to 200c. Bake for 12-14 minutes. Leave to cool on trays. Makes 30.
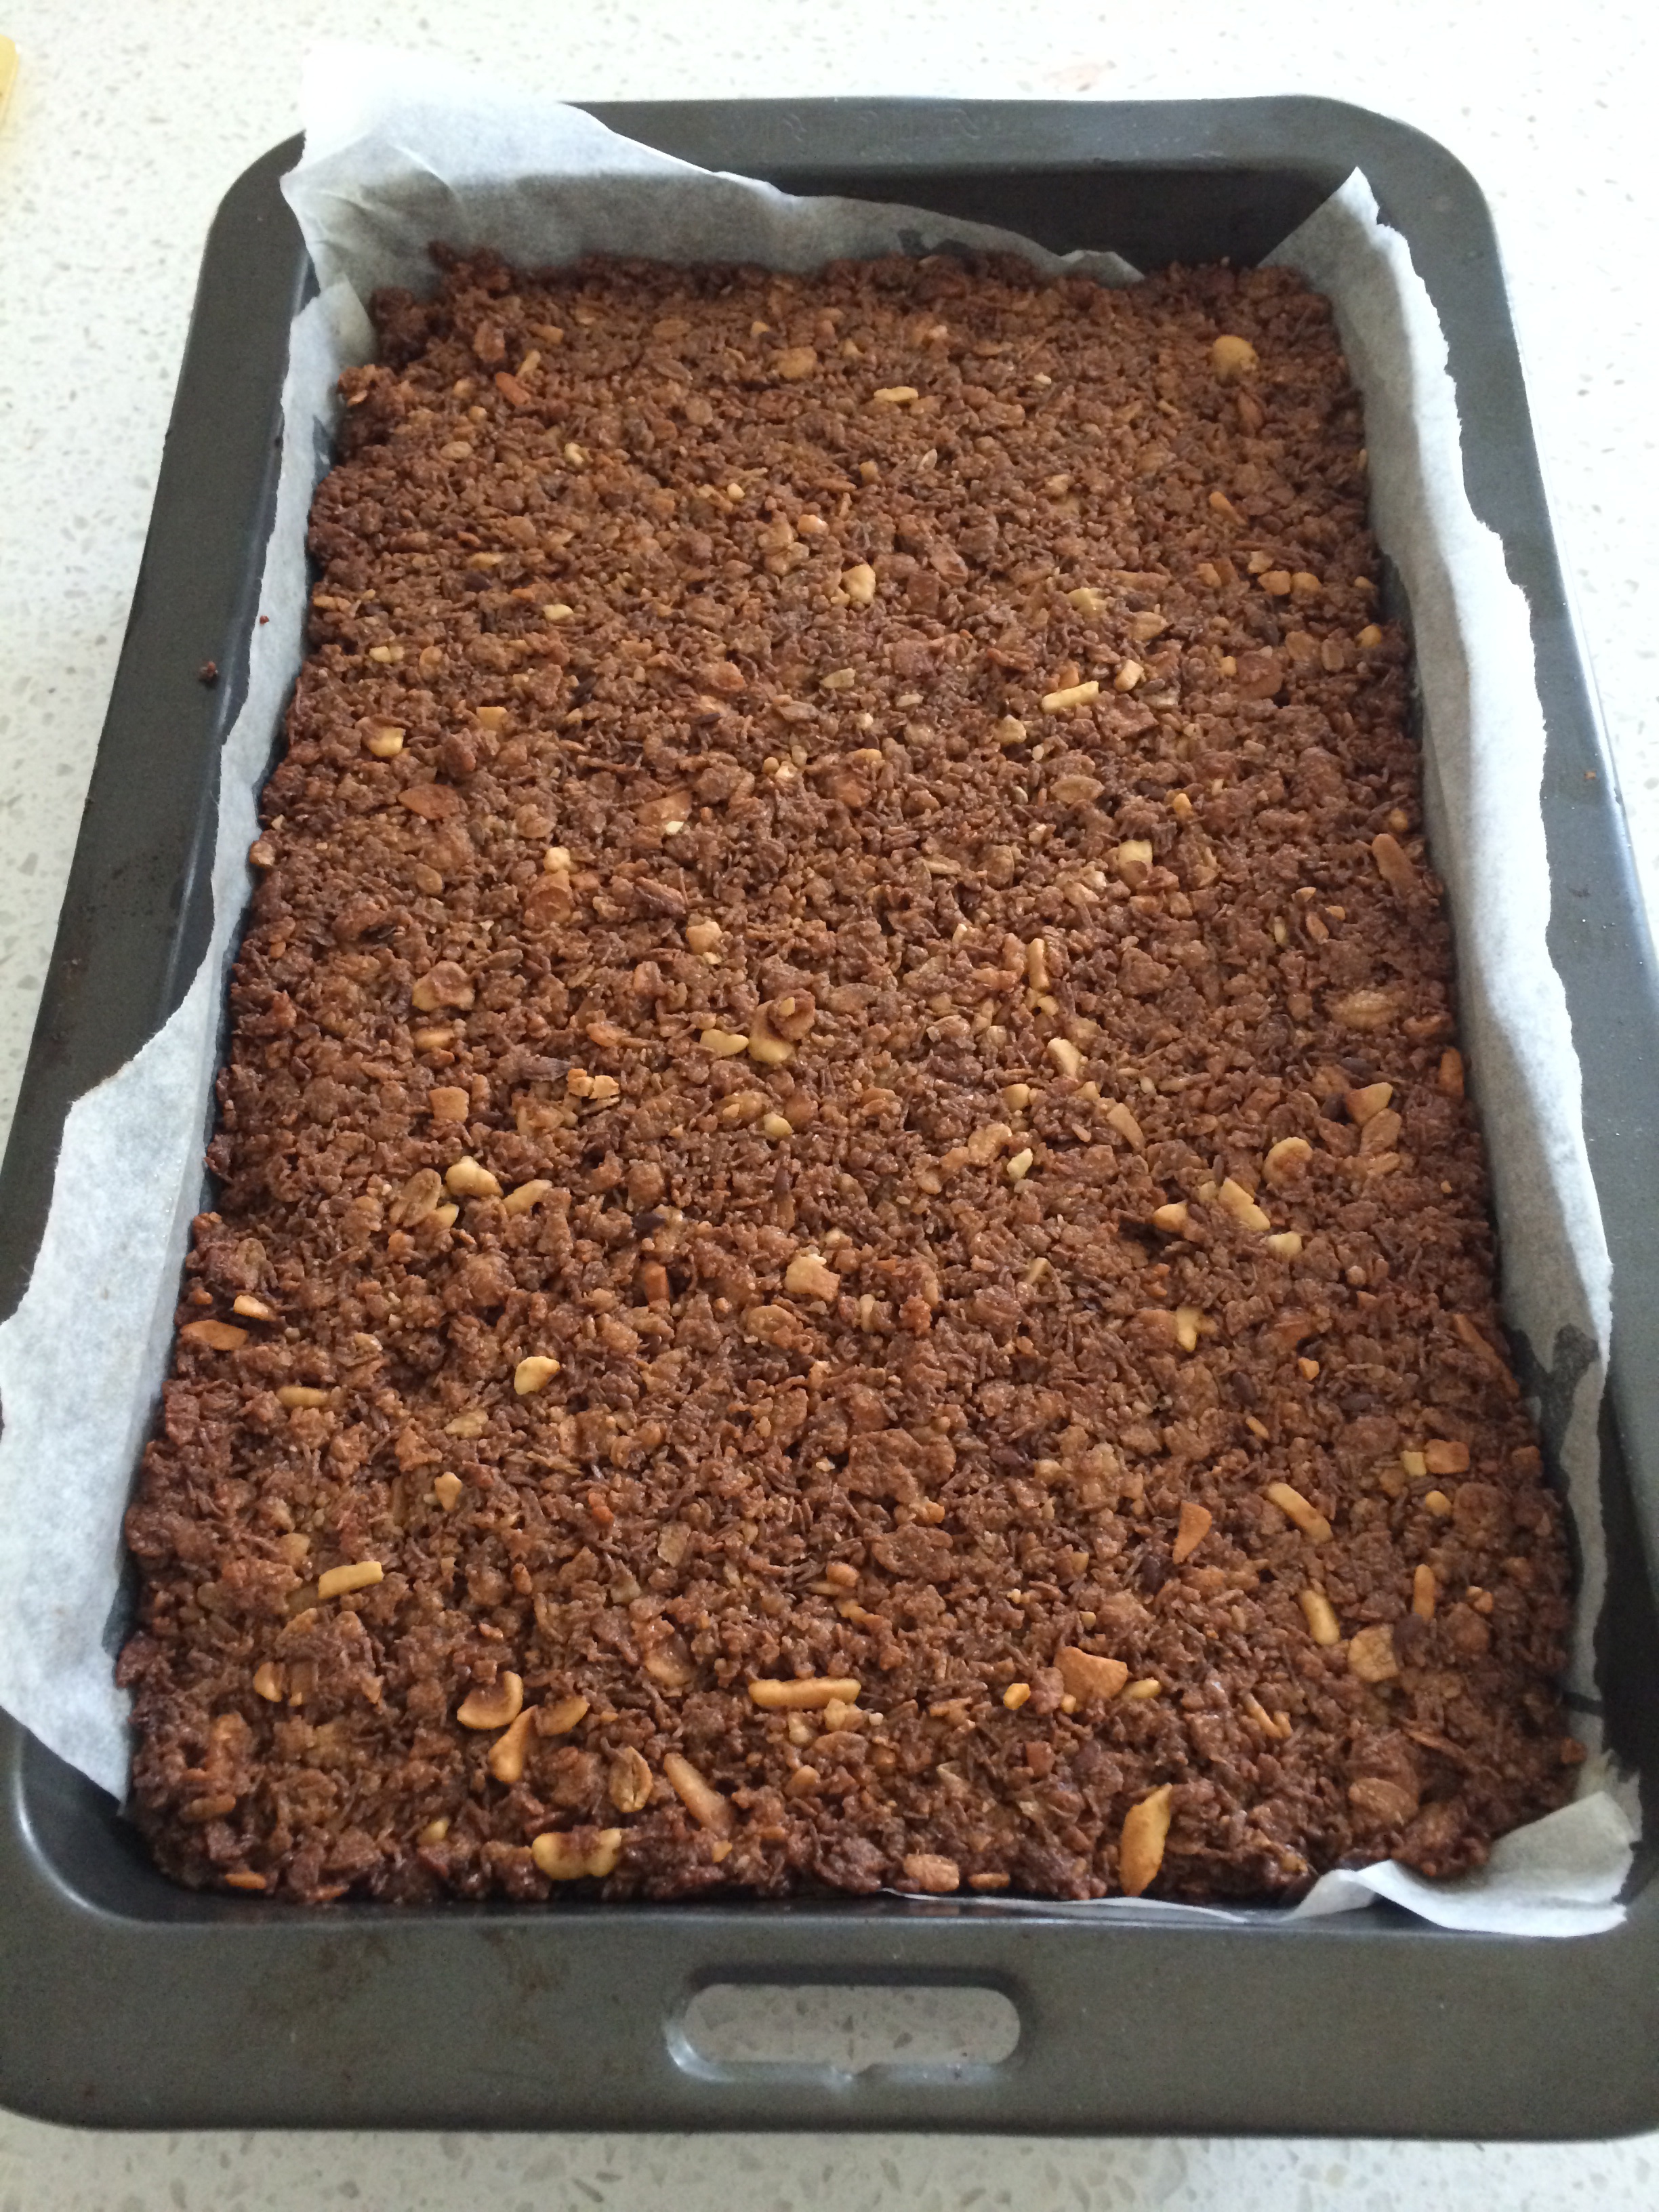
Use the packets of leftover cereals, combine in thermomix for this slice recipe (link above)from the community, left out the honey and only had 2 TB of coconut left. Great for Anzac Day, tasted just like an Anzac slice.
Below link is another good leftover cereal recipe we should try, dried fruit, chia seeds and coconut oil used instead of butter and sugar.
Pizza bread flavoured with garlic and thyme, and porridge for breakfast and school lunches
First week back from school holidays, getting back into semblance of a routine has meant less time to blog. This week is marked by food highs, one thermomix food fail( didn’t follow the recipe ) and some reliable basic recipe standards. The reliable standards were smoothies, milkshakes, pizza bread, porridge, shortbread ( a new recipe I tried from the community, had 81 top ratings and was great ) link below http://www.recipecommunity.com.au/baking-sweet-recipes/grandmas-shortbread/45249, Masterchef chocolate brownie (recipe community), wholemeal bread rolls using soft butter rolls as a base,KFC chicken recipe(road to loving my Thermomix recipe) minestrone soup,
Minestrone soup ( delicious guided recipe)Leek and potato soup (guided recipe part of chicken velouté meal)
yummy leek and potato soup, mashed potatoes , steamed potatoes, chinese style stir fried vegetables; one of our favourite Thermomix recipes and our favourite stir fry to make. Simple and cooks in 7 minutes. I usually use a kg of fresh vegetables and cook for 9 minutes and it’s done, set and forget, tip into thermomserver to keep warm, stays crunchy for ages, love it!
Perfect mash potato
The Thermomix guided mash potatoes are super smooth, tasty and super easy to prepare. Simply put on the all ingredients, no water required, and set to cook. Lastly whip for a minute and that’s perfect mash potato every time.
Porridge topped with apple cinnamon and maple syrup
Breakfast is a breeze using guided recipes for crepes, American pancakes, pikelets, poached eggs, waffles and the loveliest creamiest porridge you could imagine. Honestly, the guided porridge is really really good, ready in 11 minutes no stirring, husbands favourite! It serves up a generous 5-6 people and topped with fresh fruit, cinnamon and maple syrup or honey, it’s incredible …. Husband keeps saying “wow” and “people would pay $15 for this at a cafe.” We used to microwave porridge but this is 1000% better. Miss 8 favourite breakfast is now Thermomix porridge.
Poached eggs using the guided recipe is messy and only allows for 2-3 eggs at a time. Our favourite go to recipe is sous vide poached eggs link below
The amazing thing about these poached eggs is you place the eggs with shell on into the steamer basket, and cook between 11-12.5 minutes at 70C. We set 12.5 minutes and use between 3 and 6 eggs depending on who wants eggs . It does take a little experimentation with timing to produce your preferred balance of cooked white and yolk but it’s super cool to watch everyone crack their eggs and watch the egg slide out whole. Note the eggs have to be cold from fridge and you can add boiling water to the TM bowl and wait for the temperature to reach 70C before putting the eggs in and setting the temperature to remain at 70C for the duration of the cook time.
The Thermomix recipe fail this week was a seafood paella ( forgot to add the key spice saffron), that looked quite uninspiring but was eaten all the same . It didn’t have the lovely yellow colour and flavour but was edible. This week, I cooked pork and apple casserole with the pressure cooker and a chicken and leek pot in the oven just so I didn’t forget some old familiars. Definately enjoyed dusting off the pressure cooker. Haven’t yet converted these to Thermomix recipes, maybe later.
Friday lunch was a Thermomix high…. A pot luck paleo lunch. My friends Steph and Fran prepared some amazing dishes with the help of their thermomixes and all using paleo recipes. On the table is the yummy satay chicken ( Pete Evans Family Food) fabulous Thermomix fish cakes , healthy Thermomix Beetroot salad, crunchy seed crackers with cashew cream dip ( Pete Evans Family Food) and the most refreshing cocktail, coconut water with ginger, mango, and mint. (Pete Evans Family Food)
Thermomix paleo lunch club
We traded recipes, thernomix tips and officially geeked out on Thermomix recipes and cooking! The food was exciting and inspiring. Can’t wait to do it again.
Shortbread, bliss balls and scones for dessert
And the finale for the week was dinner cooked by Miss 14. While I took Miss 8 to ballet, Miss 14 prepared Chilli con carne (guided recipe) guacamole (guided recipe ) with corn chips for dinner. The guided chilli con carne was awesome, so flavoursome with a spice base of cinnamon, coriander seeds, and cumin, she used trimmed rump steak pre minced in the Thermomix …( we like less fat in the mince)
Chilli con carne, guacamole, nachos, and side of beetroot salad
What a treat, dinner done by lovely daughter, dessert done, glass of wine for mum … Friday night is pretty perfect!
This is the final weekend of Easter school holidays, starting with some rain, lightning and thunder, it seems like perfect weather to treat the family with hot cross buns for lunch. Using the thermomix guided recipe from the Basic Cookbook, we are rewarded with these impressive looking scrumptious hot cross buns. Previously we had looked at the recipe and been put off by the extra elements of making the cross mixture and glaze but these were literally a ‘ piece of cake’ with the thermomix and they were ready in minutes. Kneaded dough in thermomix for 3 minutes instead of 2 minutes ( note BCB cookbook states 2-3 minutes, guided mode is set for 2 minutes ) , then left in the TM bowl to prove until doubled in size. It took longer than the recommended 1/2 hour, more like an hour because of the temperature drop coming into NZ cooler weather. Lemon zest (optional) and ground cloves were excluded because we had neither in the pantry. This didn’t effect the end result. Hot cross buns buttered for weekend lunch. Super yummy and better than anything we’ve ever bought. It’s starting to feel like any time the Thermomix is on the bench there should be something proving in it because a lot of these breads, rolls and baked goodies could be frozen and taken out for school lunches during the term.
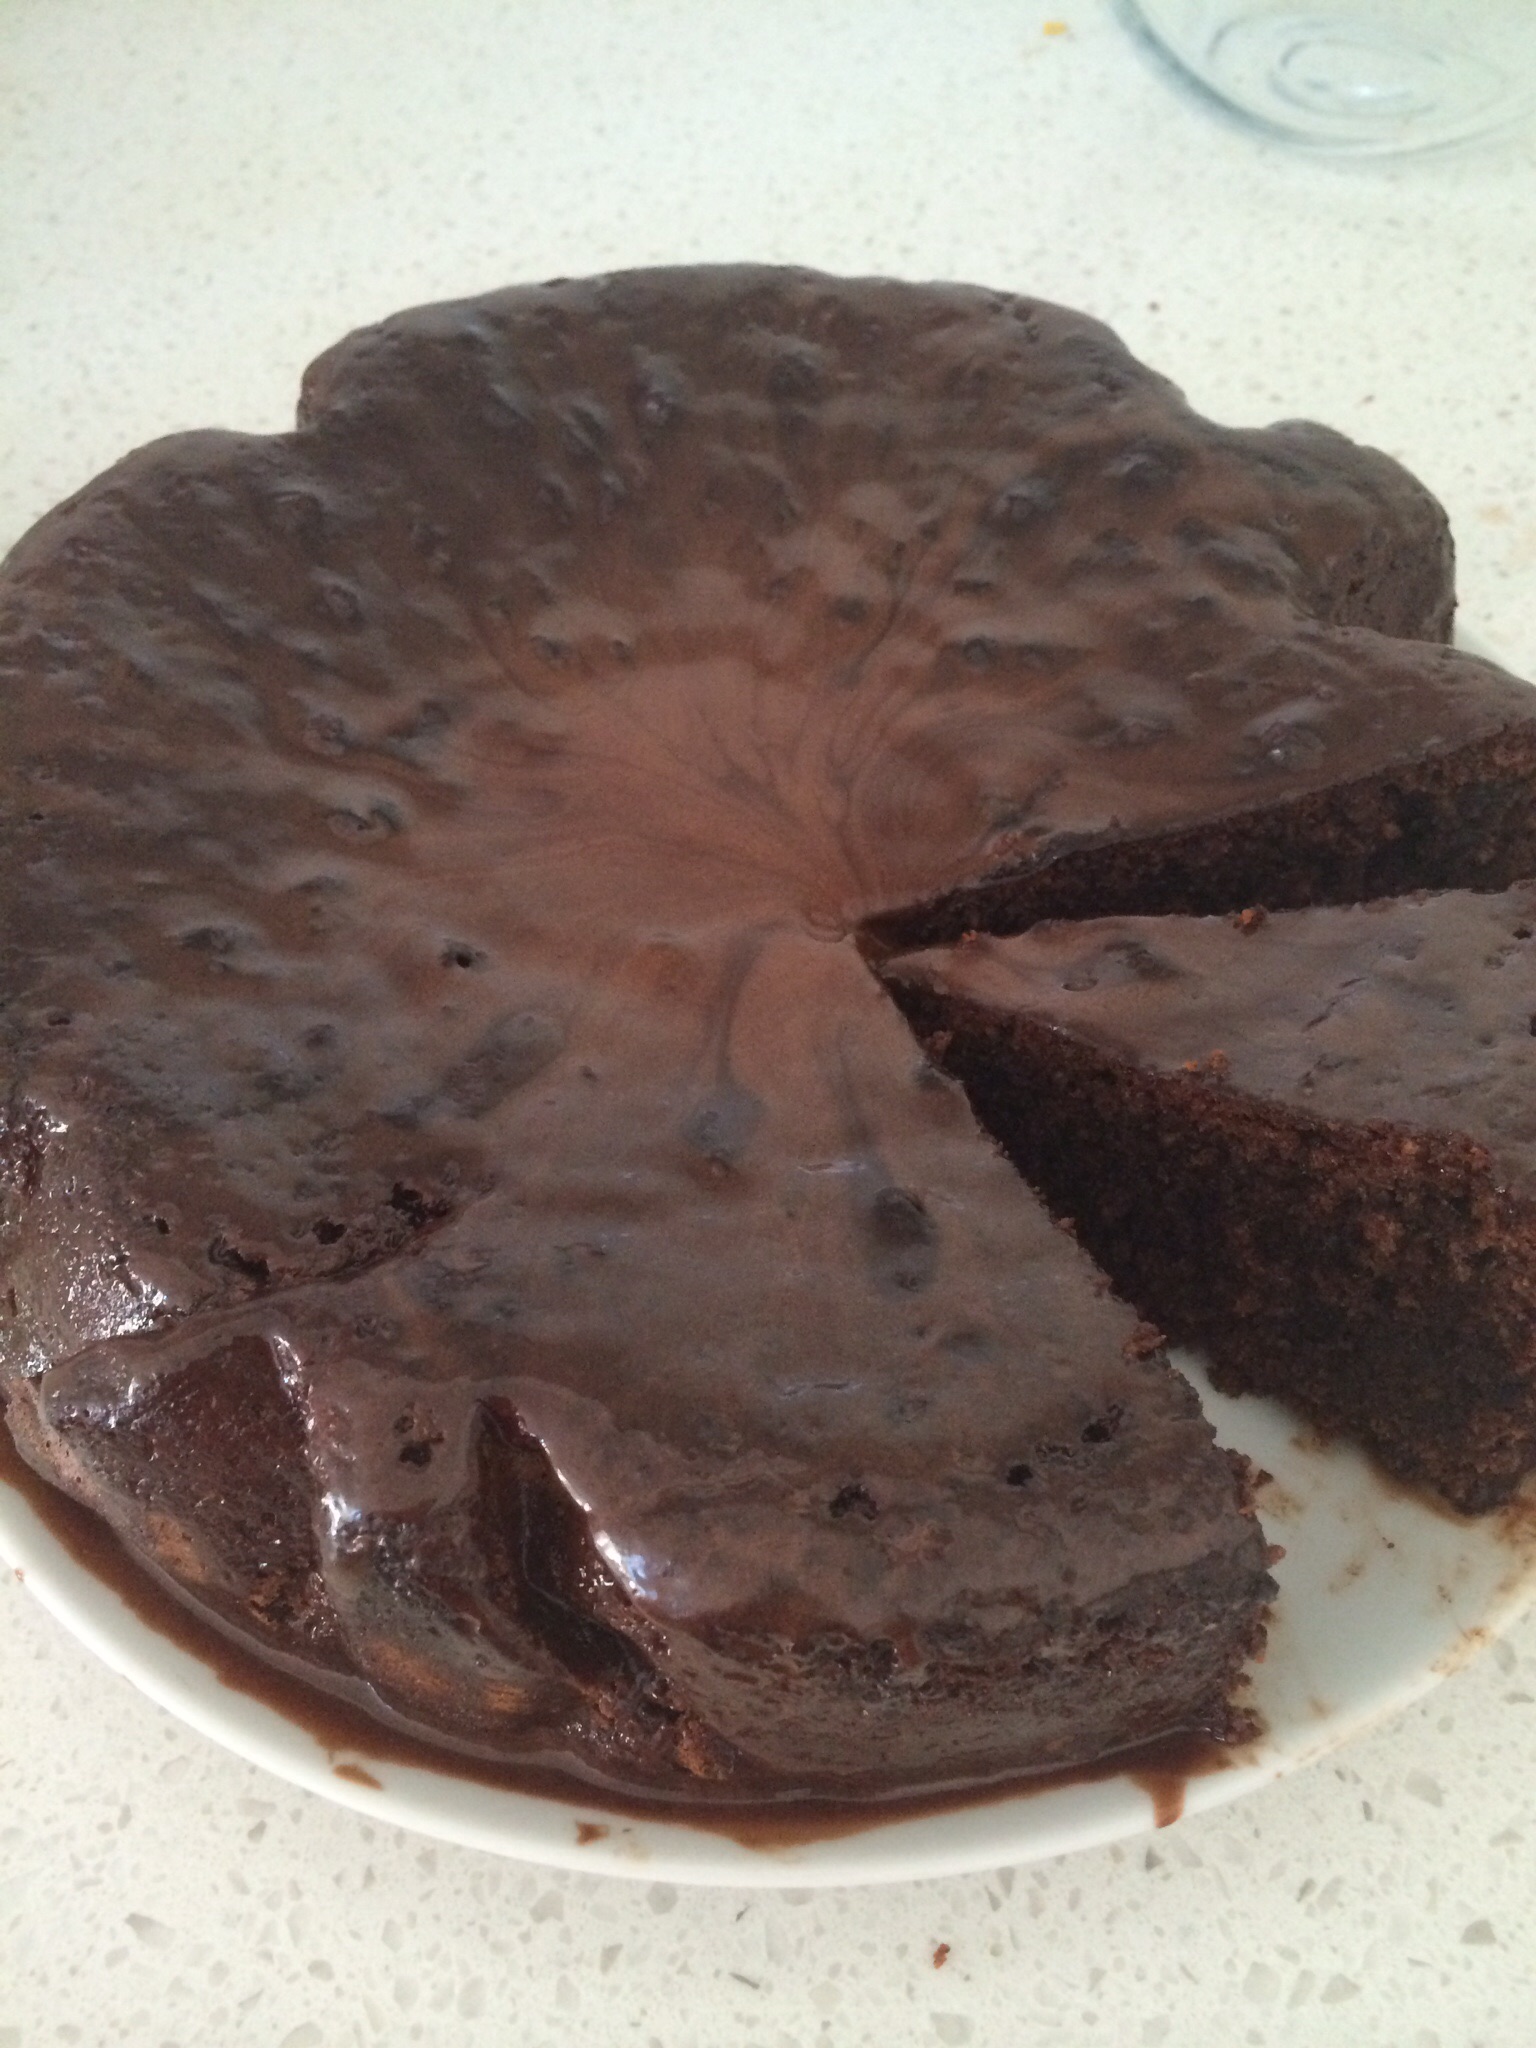
We tried this gluten free chocolate torte at the last thermomix course and it was delicious and decadent. So it was definately on the list to make. It is an almond flour based chocolate torte and another simple another guided thermomix recipe. Was a little sweet, should reduce sugar next time. Chocolate ganache not set because we couldn’t wait for the cake to cool so it was spread into a hot cake. A lovely cake for afternoon tea and kept in fridge for lunchbox treats.
Yah… Homemade bagels made for Sunday brunch. The dough was mixed and kneaded in the thermomix within 3 minutes then left to prove. Then shaped into doughnut shapes and dunked in boiling water and then baked for 15 minutes. Note: we just added some boiling water to a bowl and dunked both sides of each bagel in the water for 30 seconds alternately. 480 gm of flour in the recipe made 8 bagels. Texture fantastic. Eaten fresh from the oven with ham, cream cheese, and salad. The recipe is from the a thermomix recipe app, “robo gourmet thermomix” But have found a recipe on the super kitchen machine blog which is almost the same except for the addition of a small amount of butter 25gm in the blog.